A bit more than 5 years ago, it seemed that everyone running a blog started migrating from their good old CMS to a fully static system, built on a CI/CD and released on Netlify, Cloudflare Pages or GitHub Pages.
So, you did the same than your peers did: you migrated over to a static website generator like Hugo.
Only, doing so has a caveat: you are not able to run your old built-in WordPress commenting system anymore. The solution to this is however simple: you could switch to a hosted comment platform such as Disqus. You are now relying on a third party provider injecting a lot of bloat in your website.
So… you wonder if you could run the commenting system yourself. You search for a self-hosted alternative to Disqus and you stumble upon cool open-source projects like Schnack. That works great, except that it’s not maintained since 2020 and is quite heavy to run on a tiny VPS since it requires NodeJS. You search for other self-hosted alternatives and you find them not minimal enough, adding too much bloat.
Search no more: with the same goal in mind, I built Bandurria as a lightweight self-hosted commenting system for ANY website — starting with my own blog, that’s powered by Ghost. Bandurria works everywhere, whether your website is static or not, powered by a CMS or ran by custom PHP code. Drop 1 line of code in your HTML template, and it just works, period.
Bandurria is a tiny binary that you can run on your VPS (also available as a Docker image). It consumes 4MB of RAM to run. The JavaScript loaded by your users is less than 10KB and is served directly from your own domain. It’s built in Rust, which makes it super sturdy. It’s also very minimal: it does one single thing, and it does it simply & cleanly.
Bandurria is open-source and I will maintain it for as long as I’ll be using it on this blog. Check out Bandurria on my GitHub.
Bandurria looks like this on my own blog (where you are reading this):
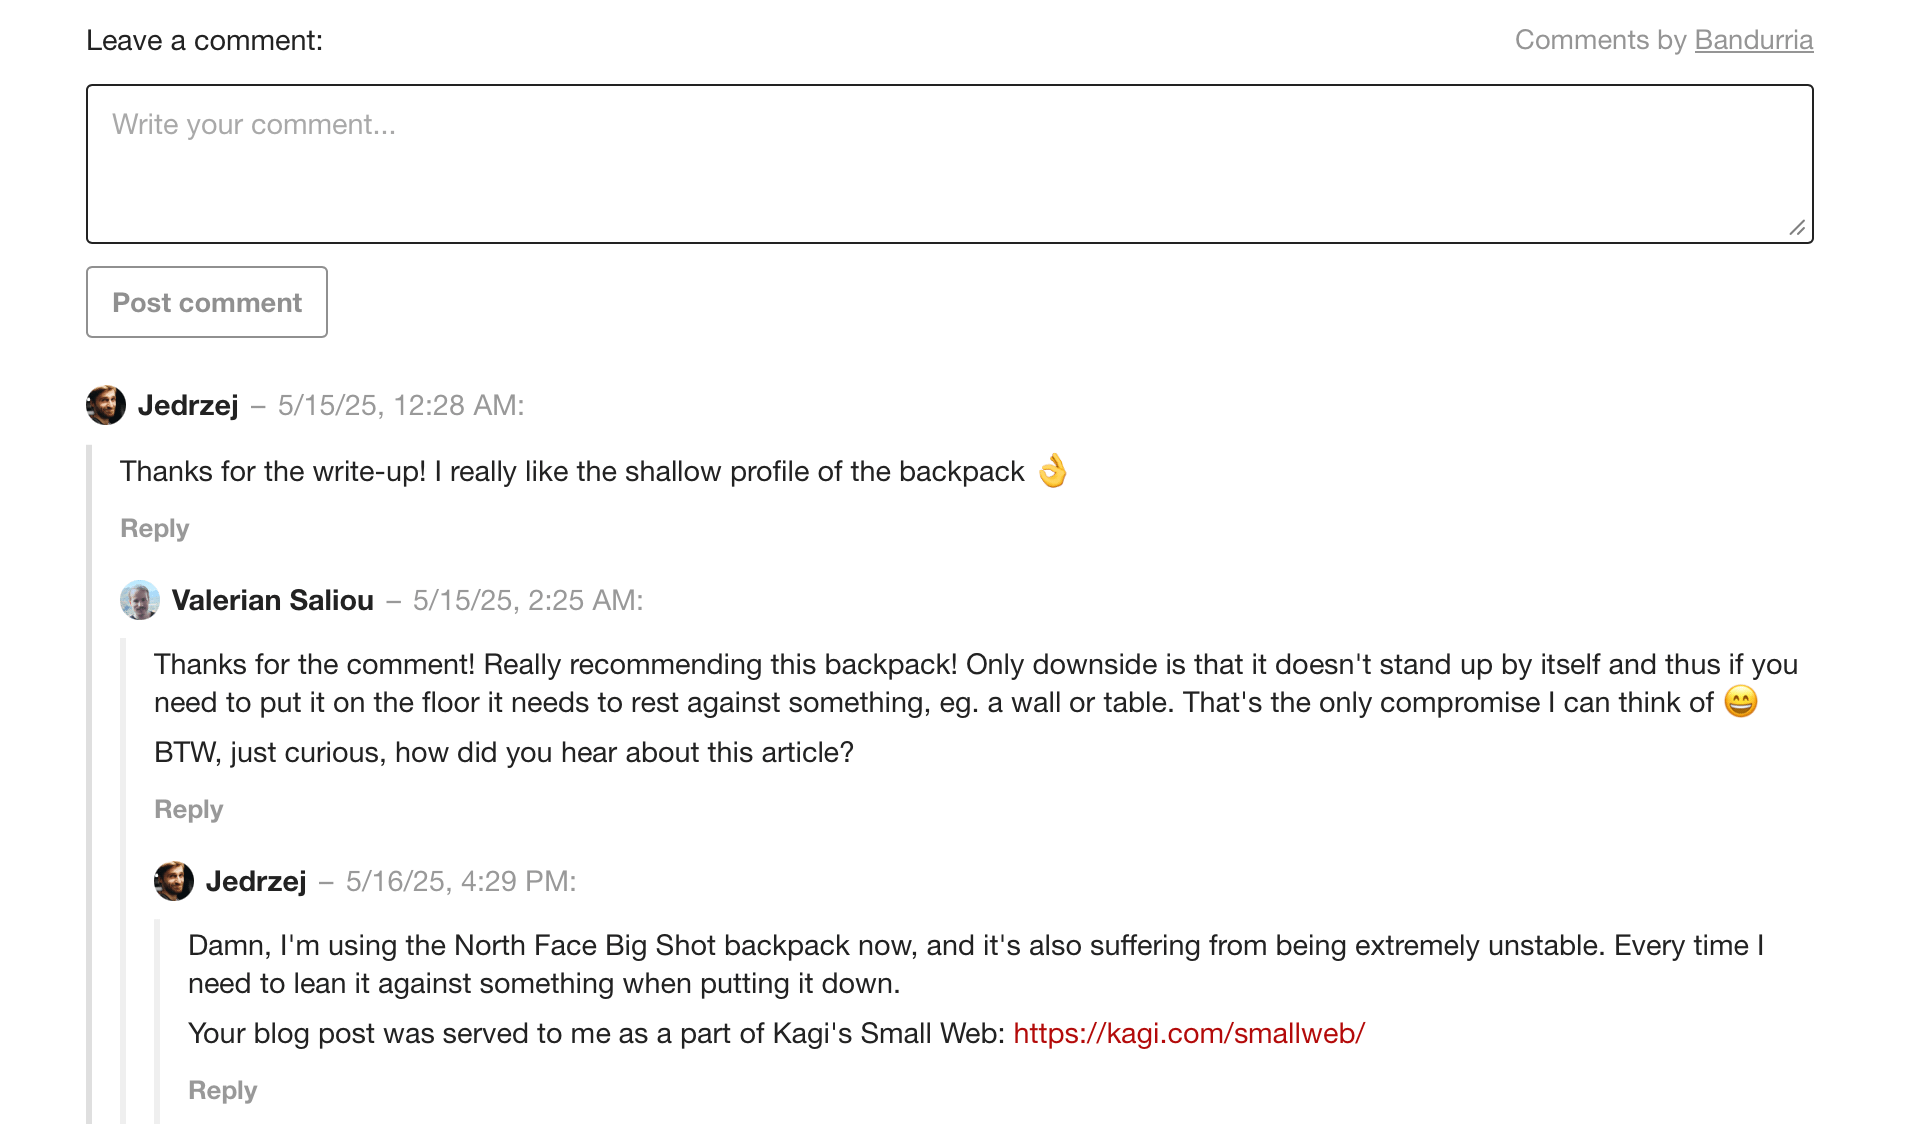
You can test it by navigating to the comments section below and say hello 🙂
Now, you may have some questions:
“That’s great, but I don’t want to spend my life moderating comments, I know that I’ll get constantly spammed by botnets”. True. But Bandurria has built-in protections against that: it deflects spammers and bots by requiring a proof of work calculation whenever someone posts a comment. The proof of work is a mathematical challenge that the user’s device has to solve, which is computationally expensive and thus requires a little bit of time (a few seconds typically). The challenge result (the “proof”) can be easily verified by Bandurria at no cost. After passing that automated proof of work test, comments submitted by your users must be all manually approved over email using a Magic Link (you can either Approve or Reject a comment). The benefit of mandating proof of work, is that it cleans up 99% of the bots upfront, guaranteeing that most comments landing in your moderation inbox are human-made comments.
“It looks great on your blog, but the style will look off on mine”. What if you want to customize Bandurria’s visual appearance? You can! It only takes one CSS file. Use this CSS file as a starting point and customize the appearance of the elements injected by Bandurria into your website.
Try Bandurria on your website in 5 minutes
So, you tested Bandurria and you want to try it out on your own website? It’s pretty easy to start.
As pre-requisites, check that:
- You can run a Linux binary (you run a Linux VPS), or alternatively Docker images in Kubernetes or Docker Compose;
- You already run a MySQL 8 database server (zero-dependency SQLite is planned at some point)
To run Bandurria, follow those steps below. Note that those are only quick start steps, and you might want to write a systemd start script or run Bandurria in Docker for your final setup.
Instructions below have been inspired from the reference instructions on Bandurria’s README file, and made simpler.
1. Download Bandurria’s binary
- Download a tarball archive from Bandurria’s latest release (we will use release v1.3.1 as an example, it might not be the latest when you read this)
- Extract the tarball and place its contents in a dedicated directory on your server eg.
/opt/bandurria/
2. Create the MySQL database
- Create your MySQL database:
CREATE DATABASE bandurria CHARACTER SET utf8mb4 COLLATE utf8mb4_unicode_ci; - Import the MySQL database schema
- Adjust the Bandurria configuration file (
config.cfg) so that the configuration value atdatabase.mysql.uripoints to your MySQL database
3. Start Bandurria
Start Bandurria:
/opt/bandurria/bandurria -c /opt/bandurria/config.cfg
4. Create HTTP reverse proxy rules
In order to make Bandurria reachable from your HTTP server, we will need to add some new rules. We consider you use NGINX, if not you can adapt those rules to your own HTTP server.
On your virtual host serving your website domain, or alternatively on a domain name dedicated to Bandurria, add:
location /bandurria/ {
    proxy_pass http://localhost:8080;

    # Important: remove the '/bandurria' prefix from the URL upon proxying!
    rewrite ^/bandurria/(.*)$ /$1 break;

    proxy_http_version 1.1;

    proxy_set_header Host $host;
    proxy_set_header X-Real-IP $remote_addr;
}
Restart your NGINX HTTP server and you should be good.
5. Include Bandurria on your website!
That’s our final step! We will now add Bandurria’s script on your website.
First, create the HTML container where your comments will be injected by Bandurria:
<!-- Your blog article is right before that -->

<aside id="comments" class="post-comments"></aside>
⚠️ It is important you define the post-comments class on this container. It will be used by Bandurria to inject comments here. You can change this class name anytime later..
This container is usually placed at the end of blog articles (if you are including Bandurria on a blog).
Then, add the Bandurria loader script right before the </body> closing tag:
<html>
    <body>
        <!-- The rest of your body goes here -->

        <script
            src="/bandurria/assets/embed.js"
            data-bandurria-target=".post-comments"
        ></script>
    </body>
</html>
👉 If you want to change the comments target class name, do so in this code section: data-bandurria-target=".post-comments".
We are assuming here that Bandurria is running over a reverse proxy such as NGINX, proxying the /bandurria/ path to Bandurria's root.
Finally, in your <head> section, include Bandurria's style, which you may customize to fit your own design:
<html>
    <head>
        <!-- The rest of your head goes here -->

        <link rel="stylesheet" type="text/css" href="/path/to/your/own/bandurria.css" />
    </head>
</html>
You may copy and paste the example bandurria.css file that I provide, and start from there.
Now, re-import your HTML theme or re-deploy your static website, and open it on your Web browser. Bandurria should appear where you injected it!
Should you have any questions or feedback or issue, I’ll be more than happy to help. Please let me know using the comments below 👇
🇨🇷 Written from Alajuela, Costa Rica.