In this article, I share a full list of the tech I travel with in my Day Bag. As a busy Digital Nomad software developer and business founder, as soon as I’m away from home I lose the comfort of my chair and big screen. This needs to be compensated by portable tech alternatives, under space and weight constraints.
Over the years (10 years now!), I’ve iterated on my Day Bag setup, going from a cheap 50€ backpack bought from Amazon, to my current stylish Nomatic brand backpack. I’ve also purposefully refined every object held in this backpack. As a minimalist, I constantly re-evaluate what I own and only keep what I use, selling what I don’t use. This methodology helps me keep my travel bags light.
When hopping on a flight to go to a destination country where I’ll spend months, I travel light, full carry-on mode. All my clothes and accessories (including a portable coffee maker, yes!) go in my carry-on suitcase. All my tech goes in my Day Bag. My 2 bags always stay with me, meaning that I never lose them.
I’ll explore my whole setup step-by-step. At the end of each section, I’ll provide a full gear list, so that you can buy the same products if you’re interested.
Navigate straight to gear:
🎒 The Backpack
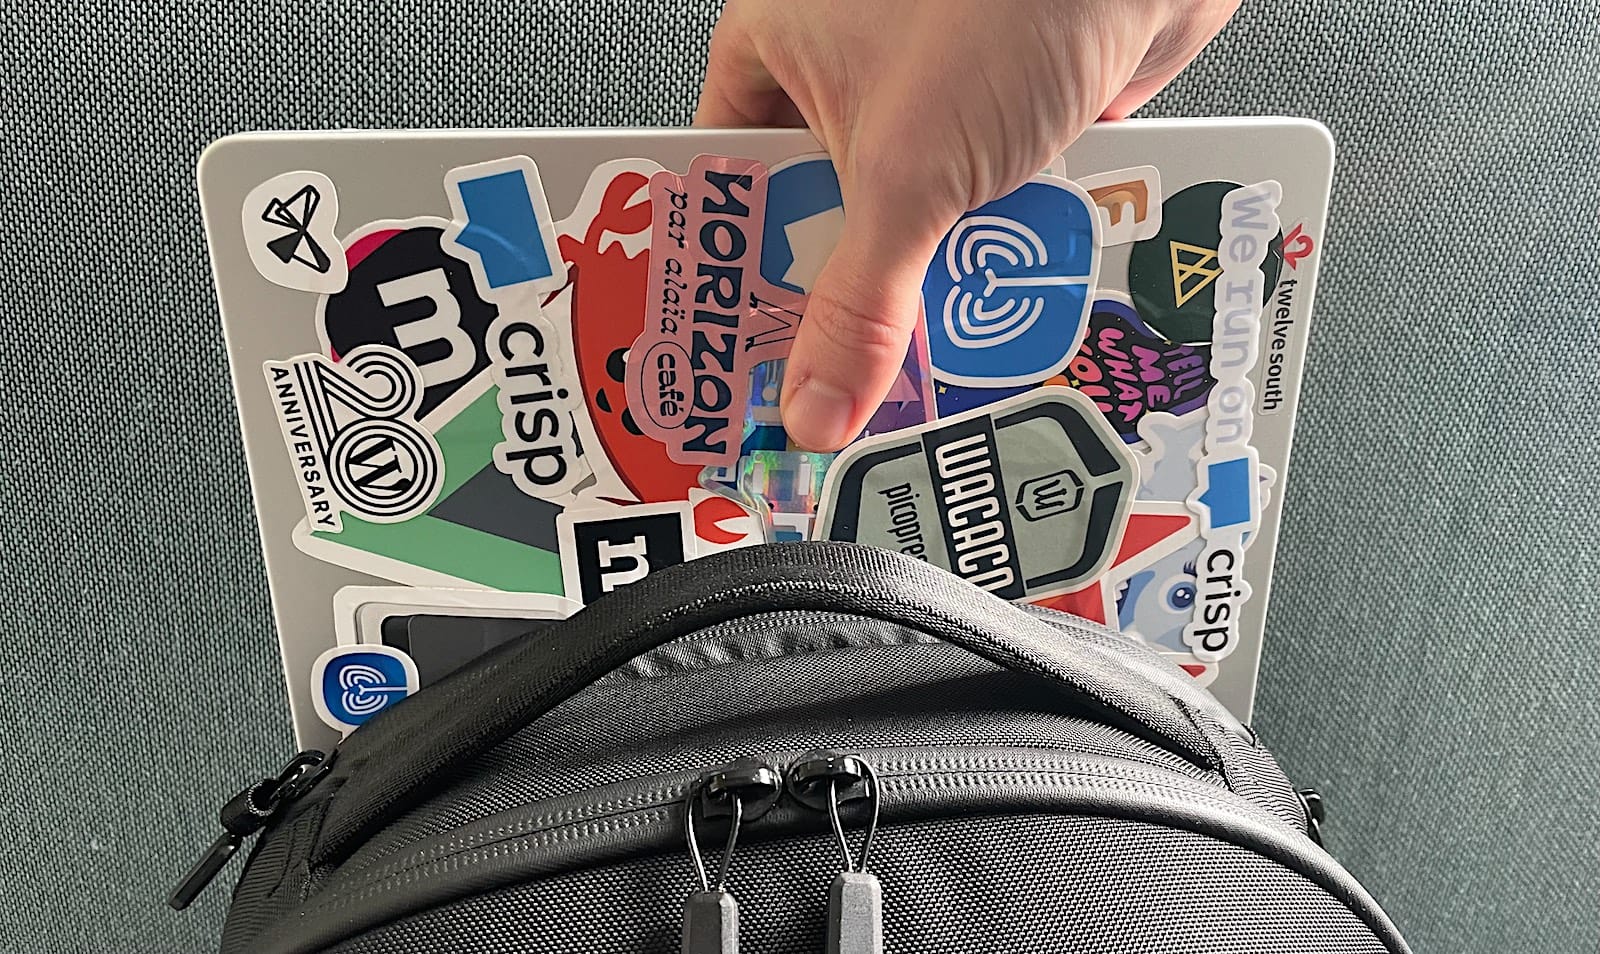
My backpack, called “Day Bag”, is a Nomatic Navigator Pack 15L. It’s expansible to 21L, though I never use that. I always carry it with me through the day: going to coworkings, coffee shops and restaurants, hence the word “Day” in “Day Bag”.
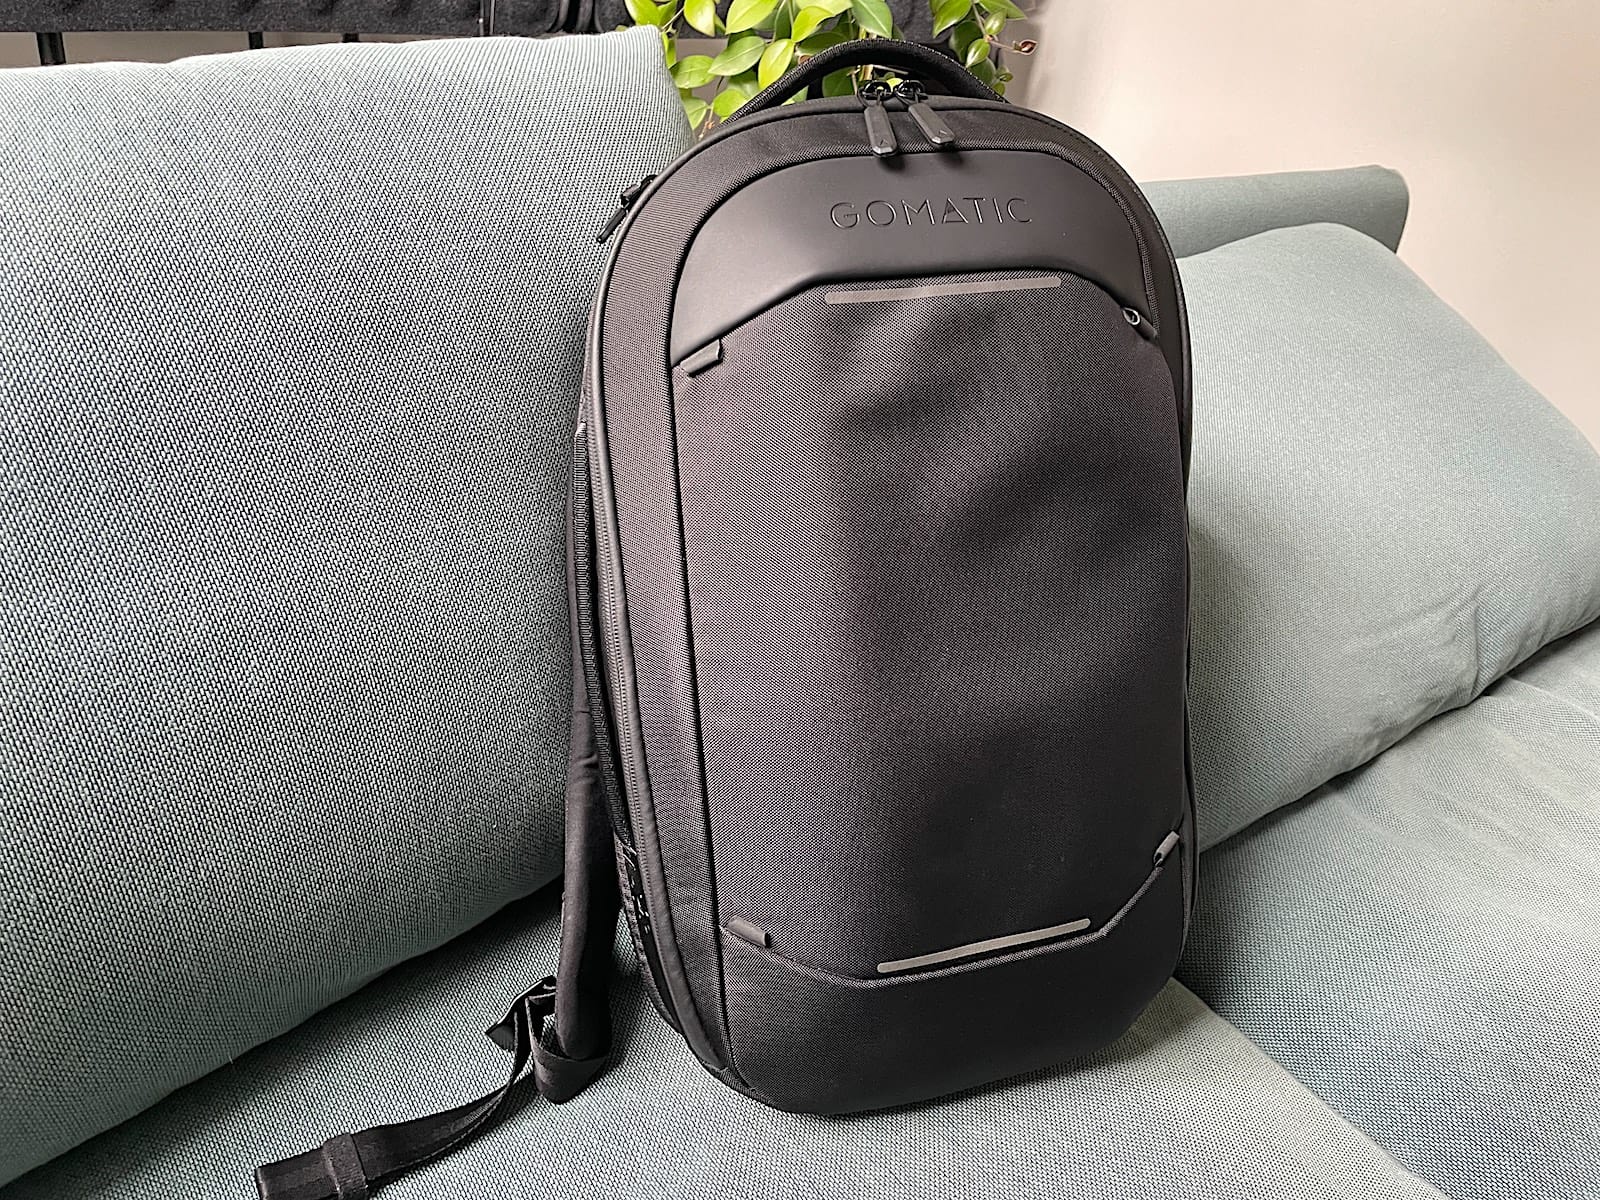
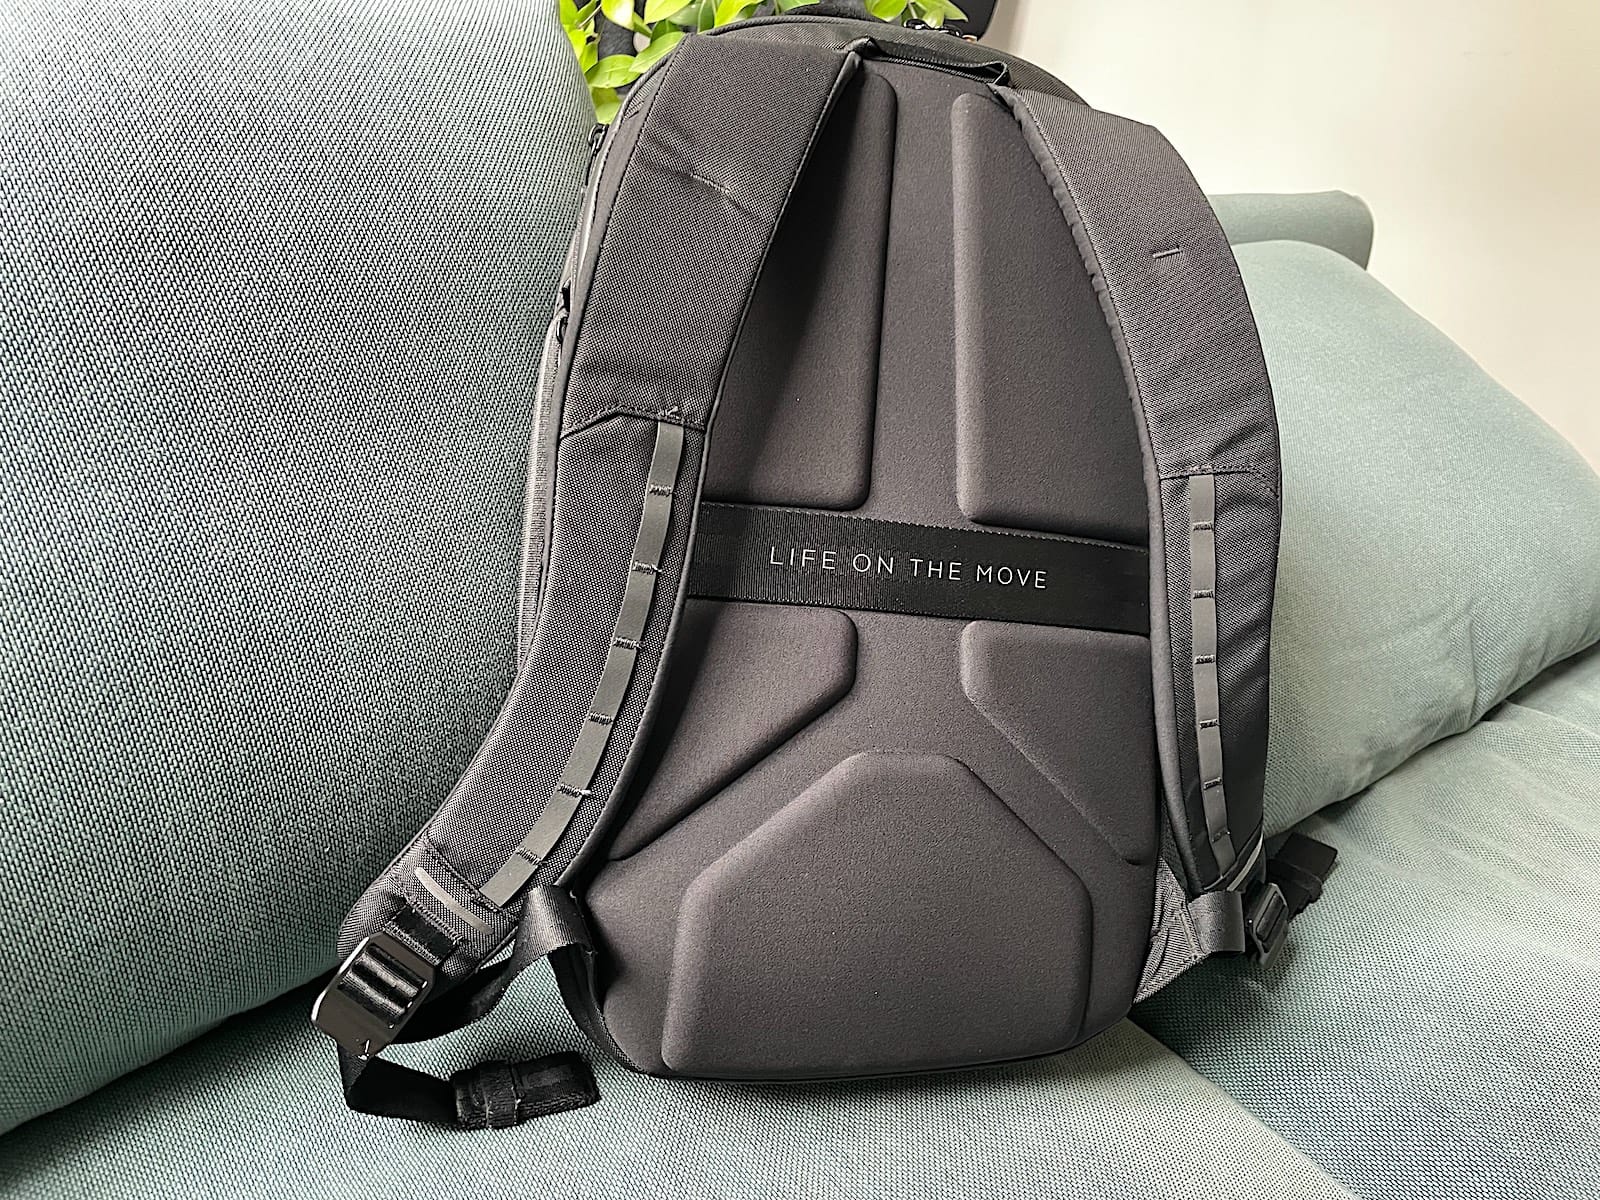
It’s very comfy to wear on my back, the materials it’s made of are very durable (mostly Nylon). The zippers and textiles are water-resistant, so that your tech will not be moist after a rainy commute to the coworking. Its structure lies between a hardshell bag and a regular bag, meaning that the bag keeps the same shape, no matter if it’s empty or full.
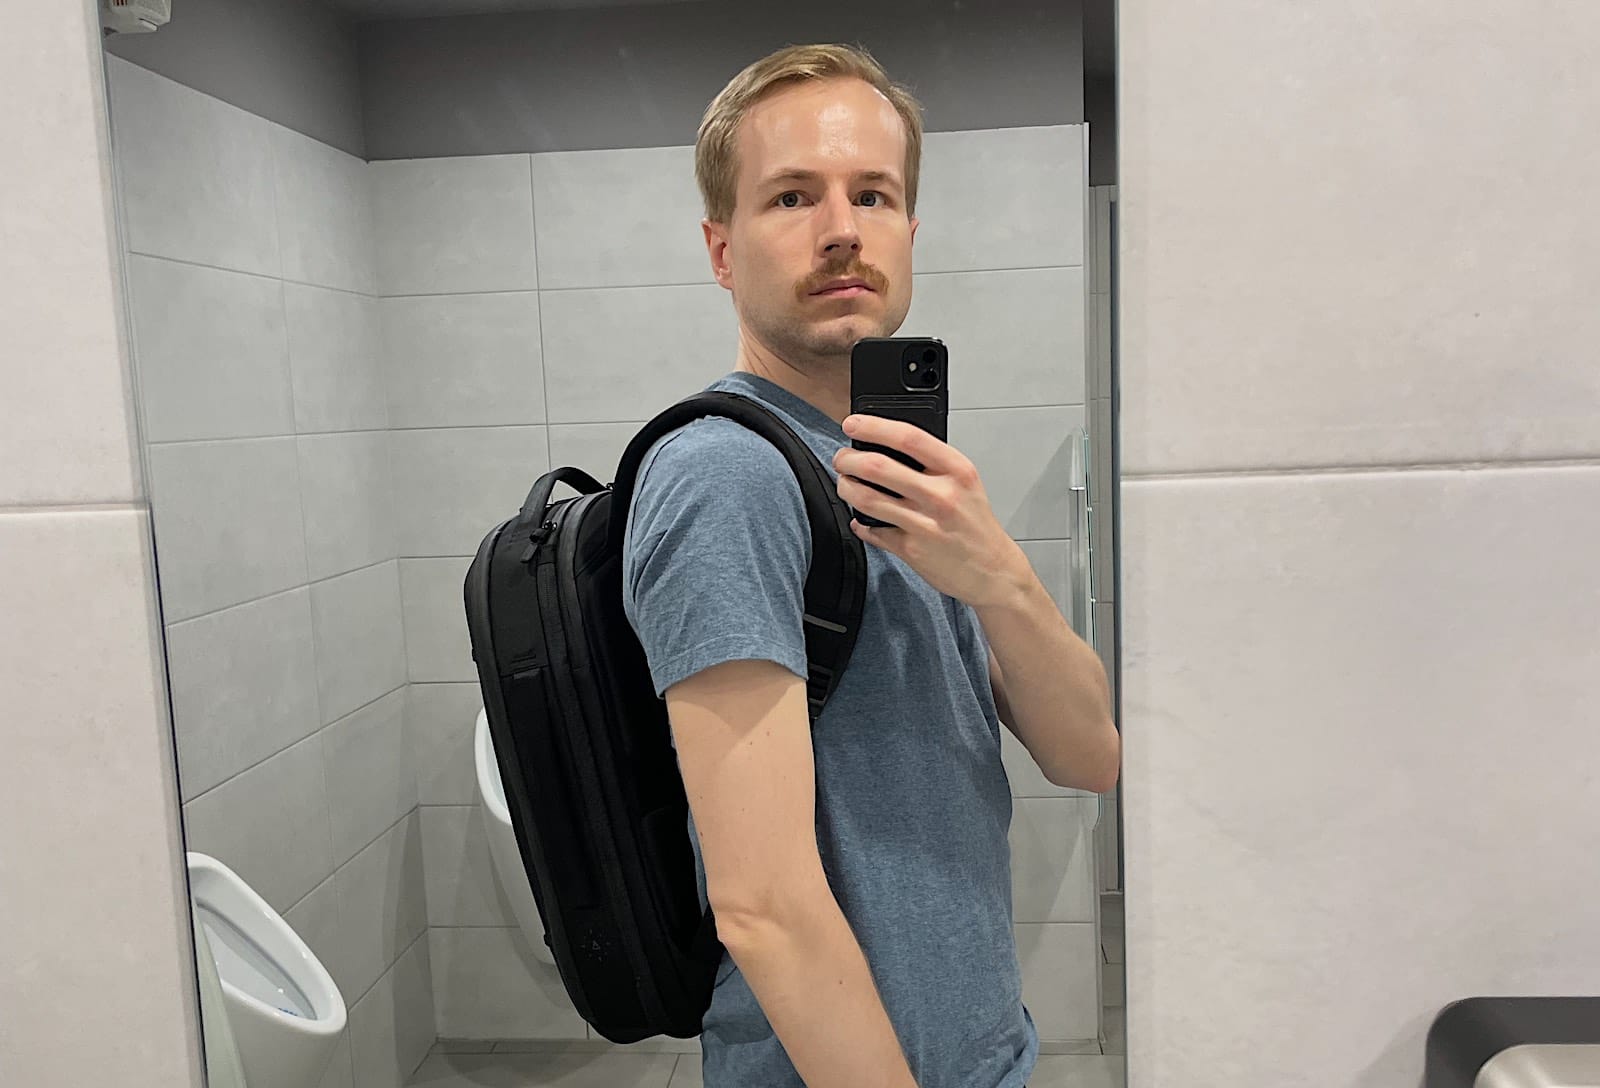
The semi-hardshell structure is also a good thing for minimalists like me, since over-filling it will make it impossible to close the bag compartments (the materials do not change form and expand to conform to what’s inside). You will therefore have to be extra mindful as to how much you store inside. When worn, it looks flat and stylish.
In terms of durability, after 2 years of daily use, it looks almost as brand new, although I’m generally very careful with my stuff. The only wear I’ve seen is on the front flat plasticky surface on the top, which scratches easily when your bag rips against other surfaces, and the metal parts of the straps. Those metal parts are painted black, the paint tends to come off easily after shocks, which happen all the time when you put the backpack on the ground. After a few days of use a stainless steel-like metal color will start appearing on the edges of those parts, since the paint has chipped off. My advice to Nomatic, would be to use a different coating method, eg. anodized and dyed aluminum, or alternatively, a durable plastic.
The backpack comes with front straps attached, which look unsexy in my opinion. They can be used to move extra load on the backpack external surface, such as a yoga mat. Luckily those straps can be removed from the bag. I found them to be of no use for my needs.
If you want to know more about this backpack, check this excellent review, which prompted me to choose this bag over the competition.
ℹ️ Note that my backpack is branded “Gomatic”, since I’m from the EU. Gomatic is basically the EU brand for Nomatic. It’s the exact same company, exact same products, branded differently, since apparently the Nomatic brand was not available in the EU. I suspect that most readers will be out of the EU, thus I’ll refer to all Gomatic products as Nomatic from now on. If you are in the EU, please refer to them as Gomatic; the product names are the same.
Gear List (Day Bag)
- 🎒 Nomatic/Gomatic Navigator 15-21L black
- Product: Go to product
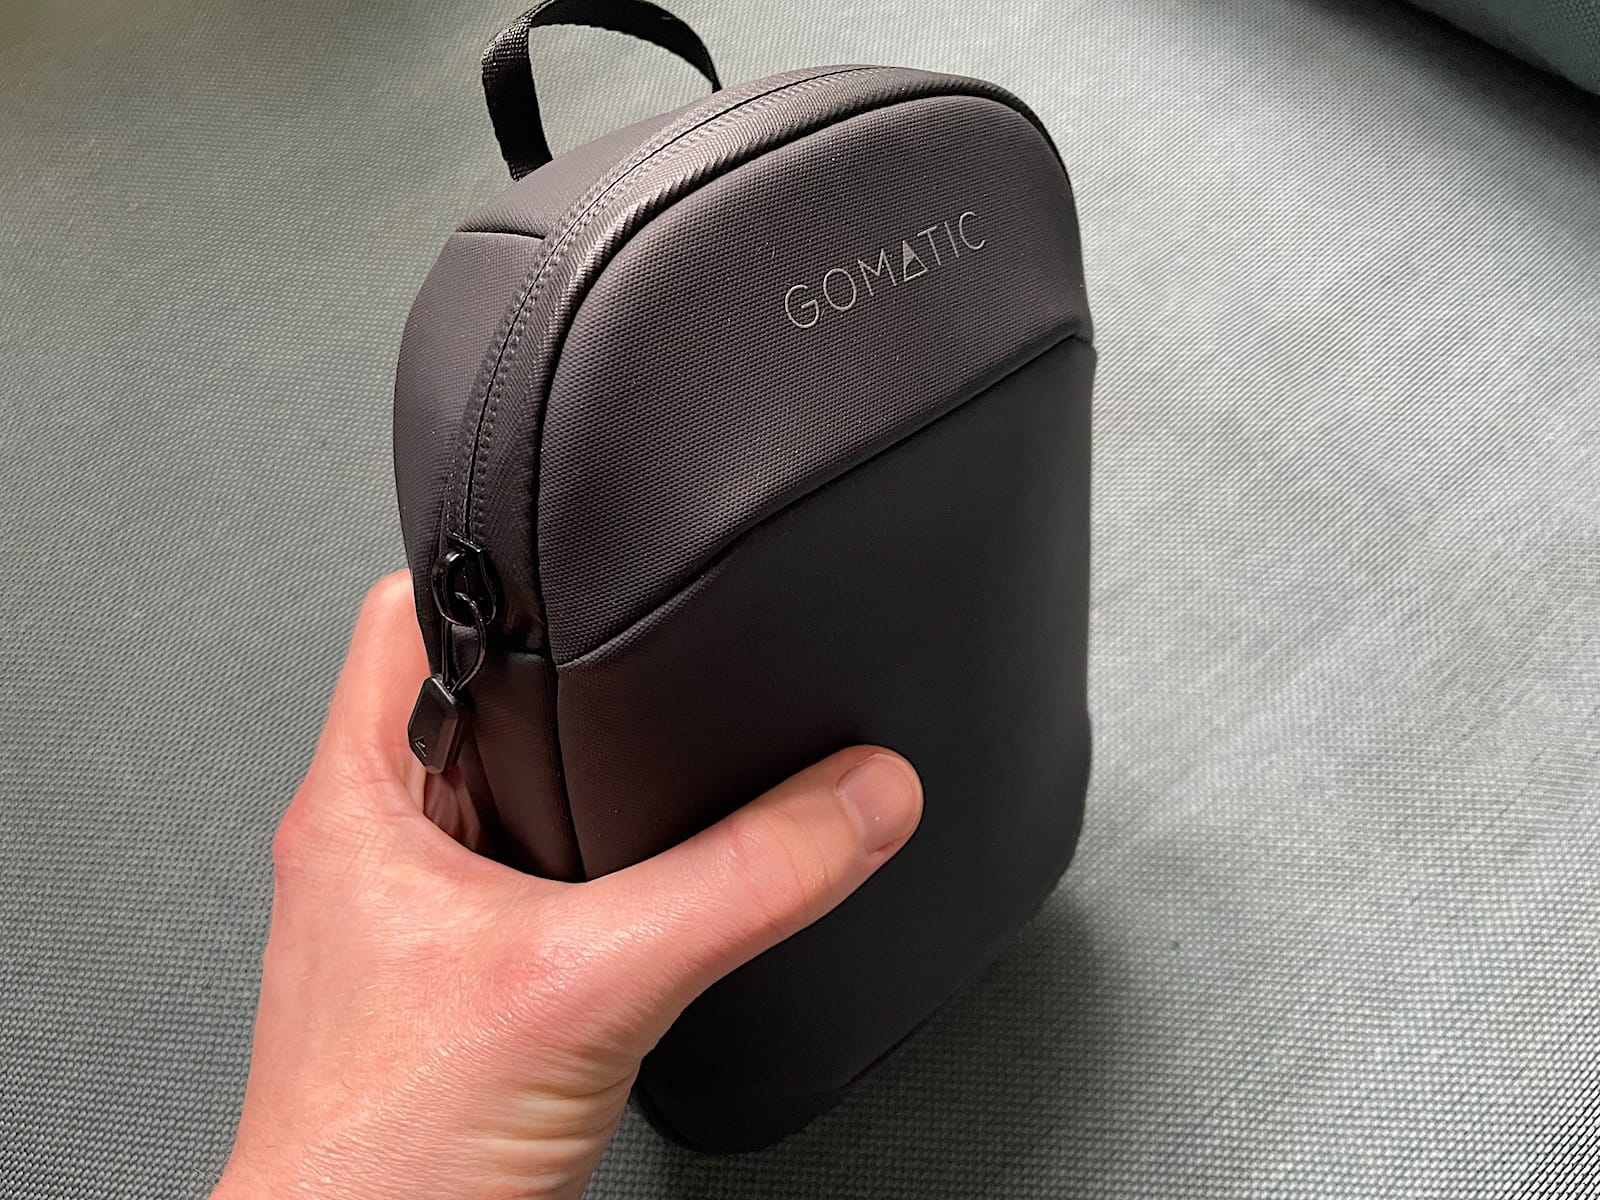
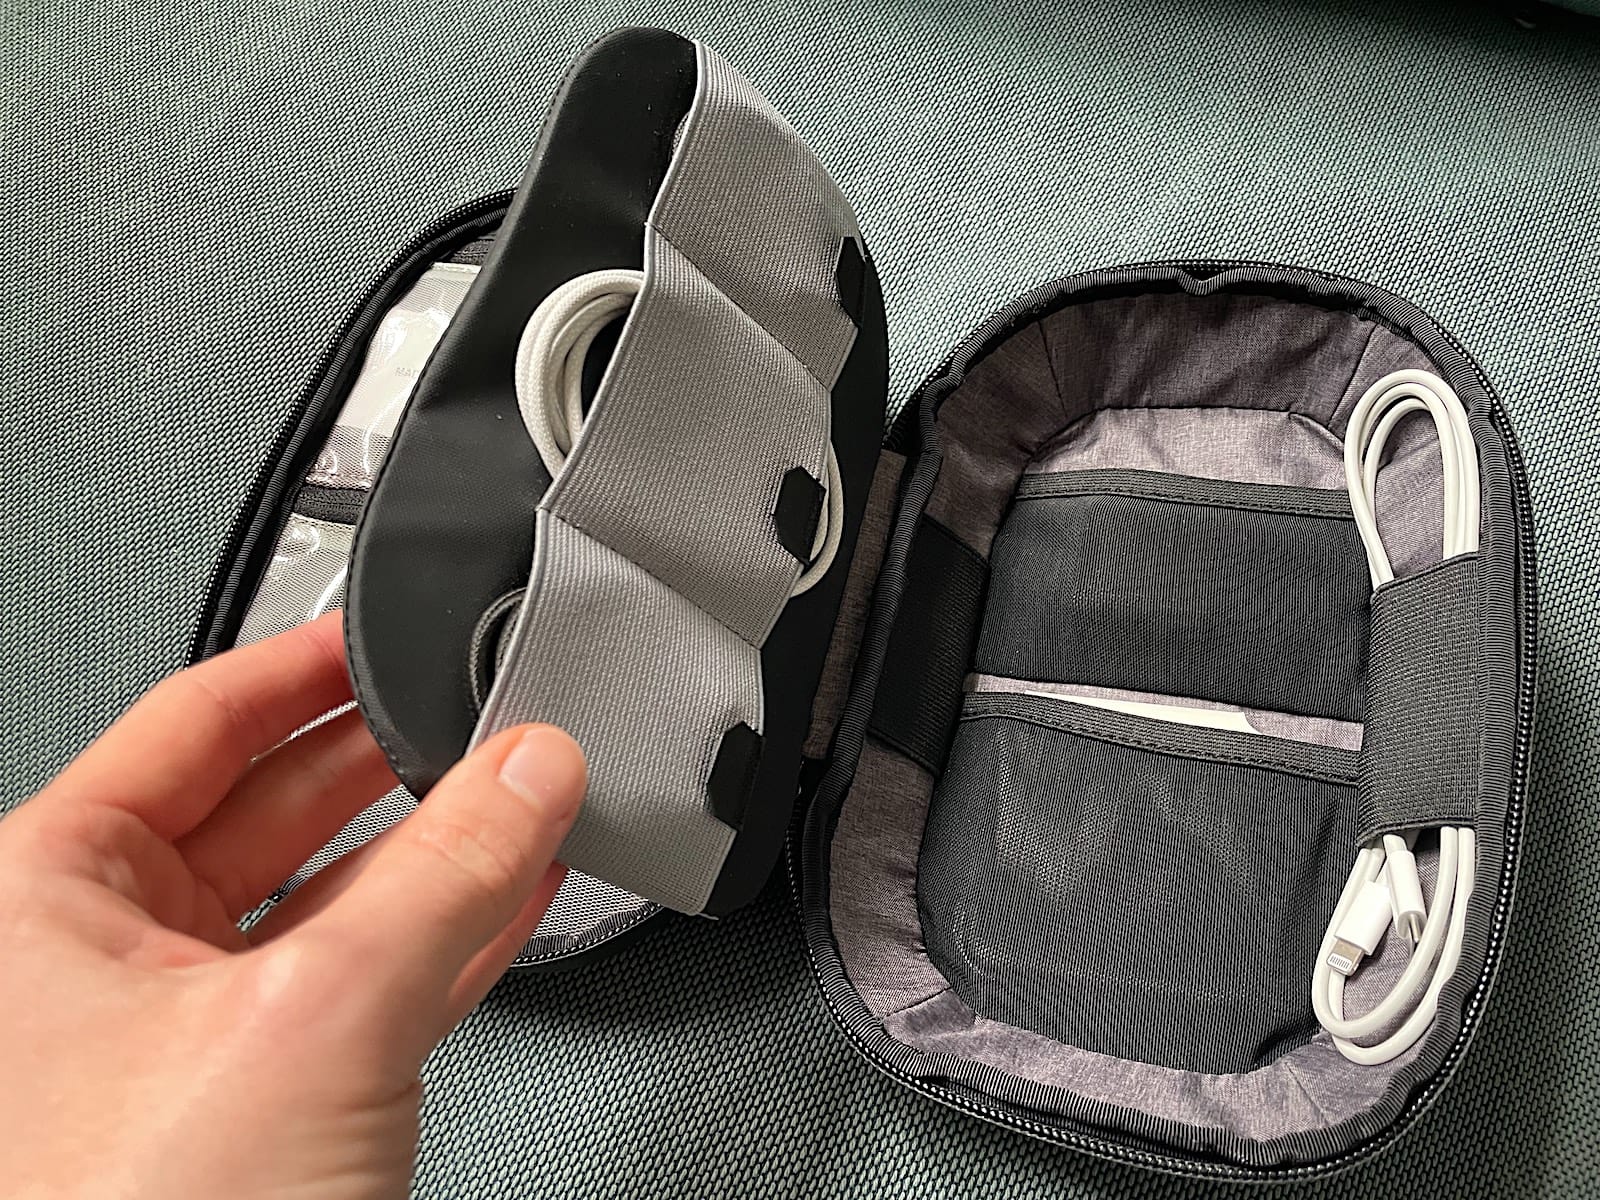
- 🎒 Nomatic/Gomatic Navigator Tech Organizer black
- Purpose: small bag used to store small tech items, such as USB adapters and cables. Stored inside of the backpack itself.
- Product: Go to product
⤵️ Inside The Backpack
1. The Main Compartment
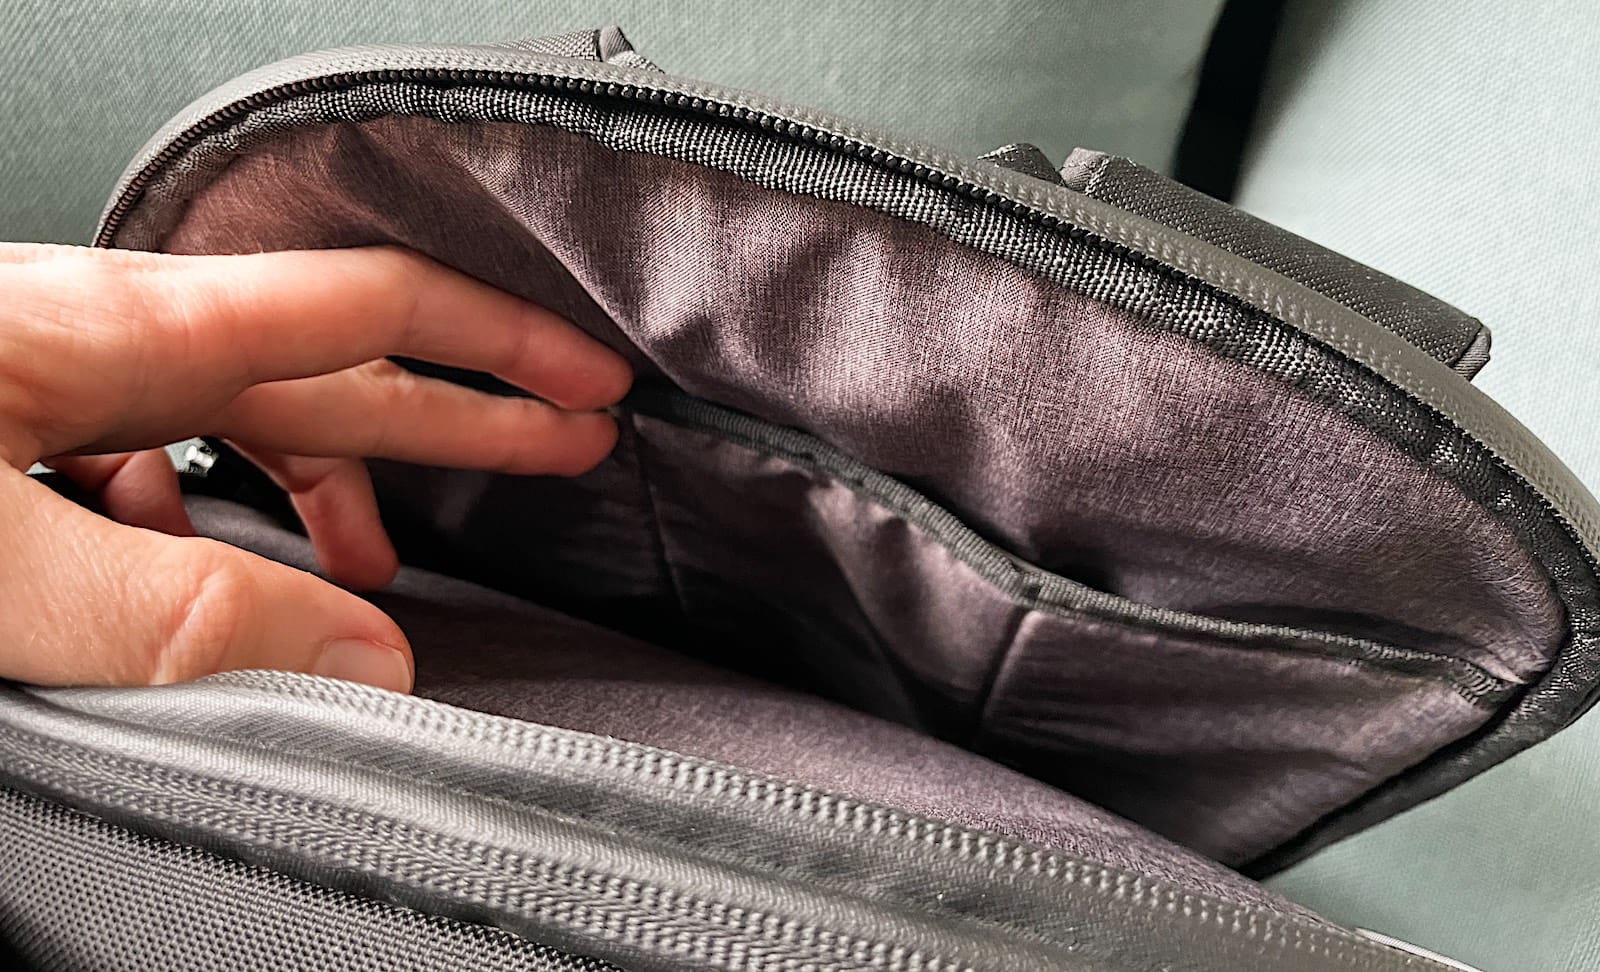
The Main compartment is the most spacious area of the bag. It contains 4 small mesh pockets for small items, 1 large mesh pocket, and 2 large zipper pockets (one of them is RFID-blocking).
It’s where I store all my small tech items, such as my laptop charger or mouse. Every object has its place in a dedicated pocket, which make organizing a breeze.
In this compartment, I also store my Nomatic Tech Organizer, which add more room to store small and delicate objects, such as USB adapters, my SD card or my YubiKey.

🛠️ Special Hacks
Those are tips that you can get inspired from to optimize certain aspects of your own setup. Those hacks are the result of years of iterative improvements.
1️⃣ Hack 1: Optimized international plugs for the Charger
When you travel internationally, there’s always an uneasy situation with your laptop charger’s AC electrical plugs. Most people add an international adapter on the top of their existing charger, making it big, ugly and prone to falling off from the wall outlet. Adding to that, your desk is not always located right next to an electrical outlet, so you need a long, heavy cord.
My solution to this problem is the following:
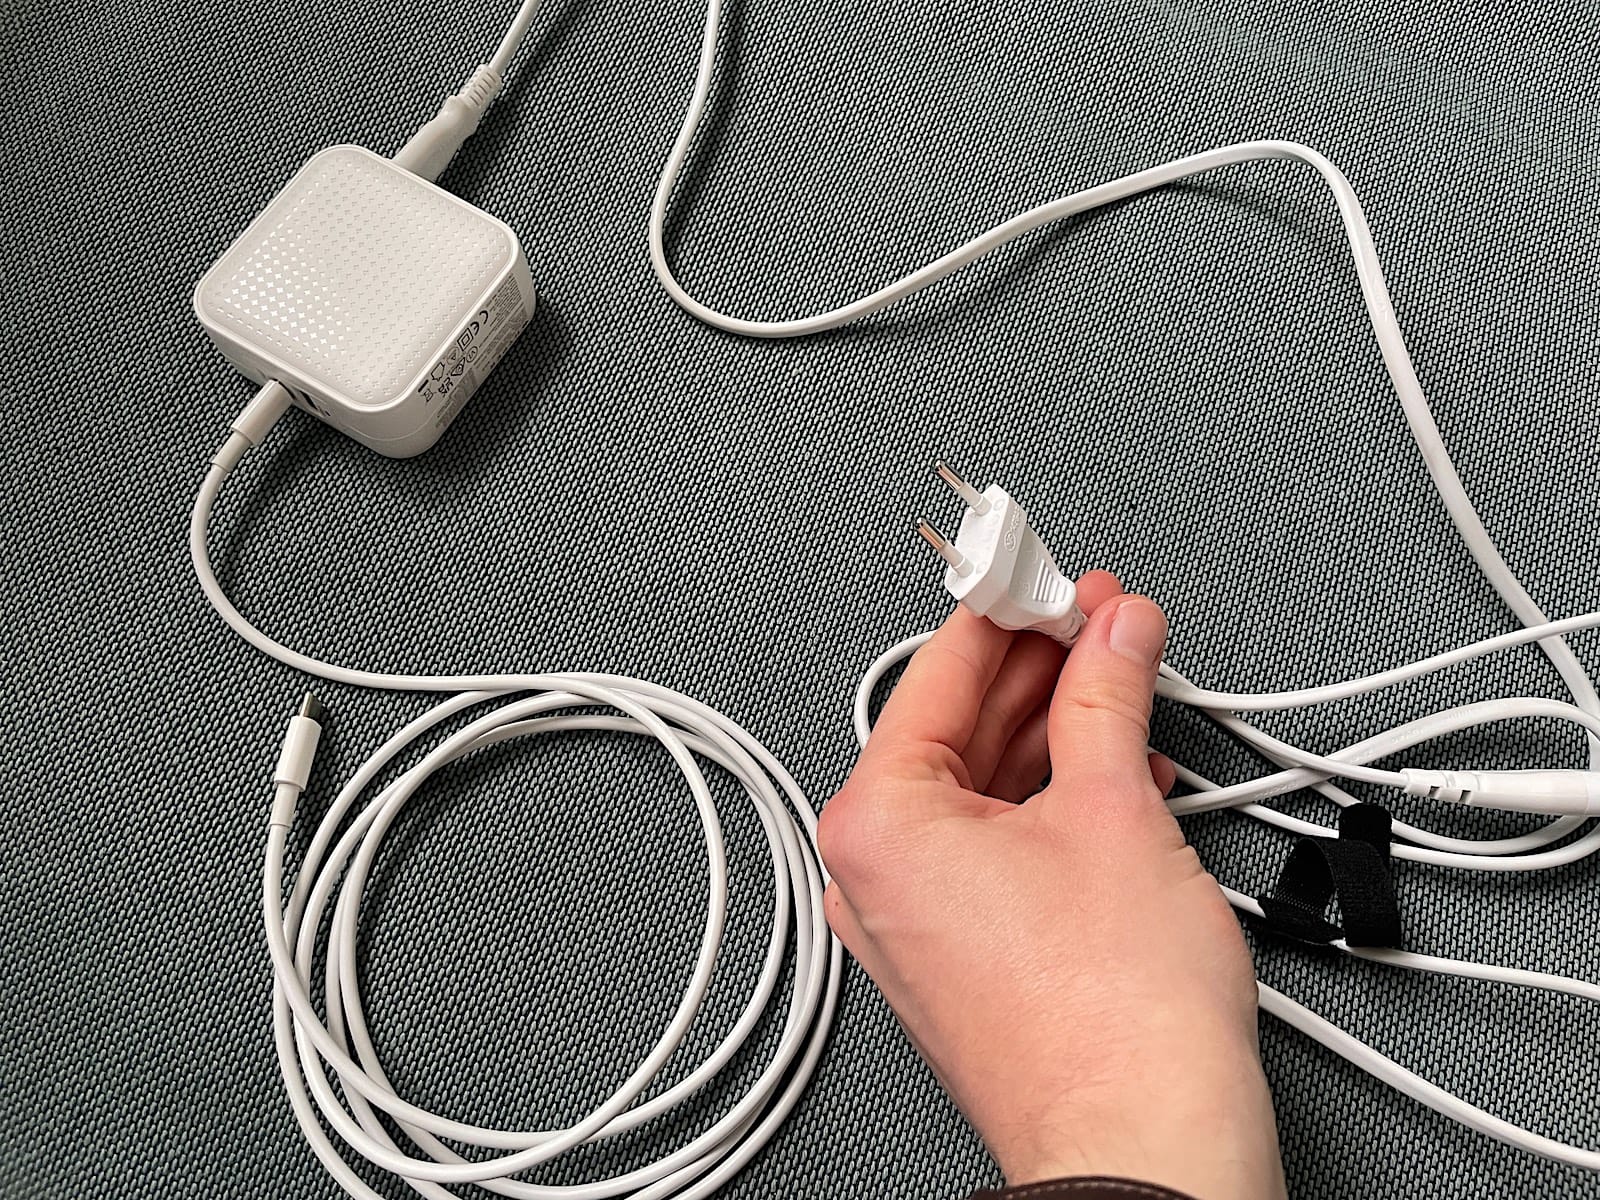
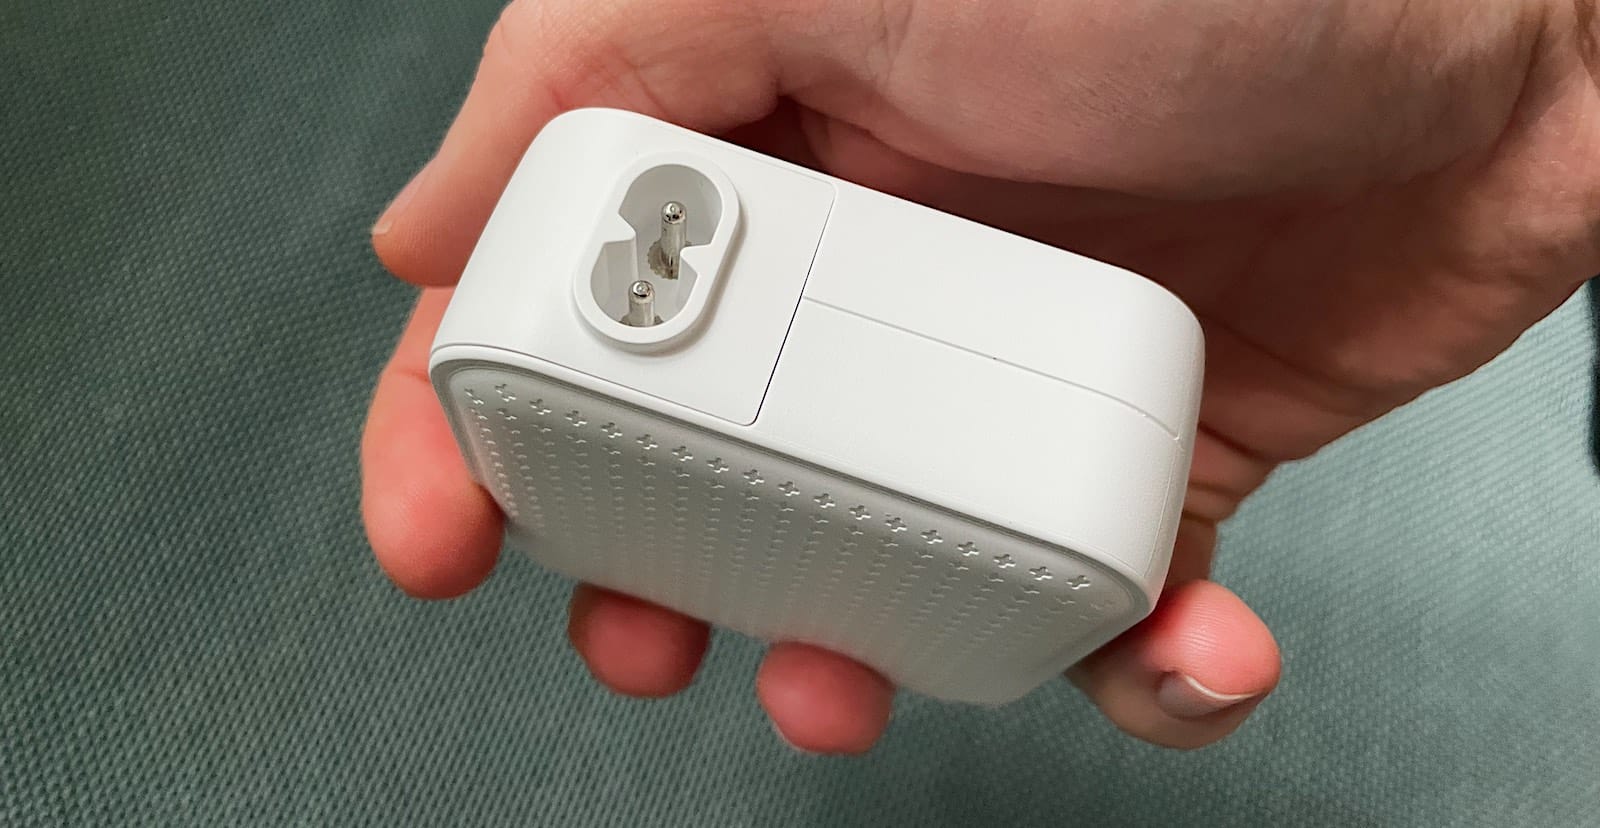
- I use a laptop charger with a universal C8 adapter for the AC connection (the HyperJuice 70W USB-C GaN Travel Charger).
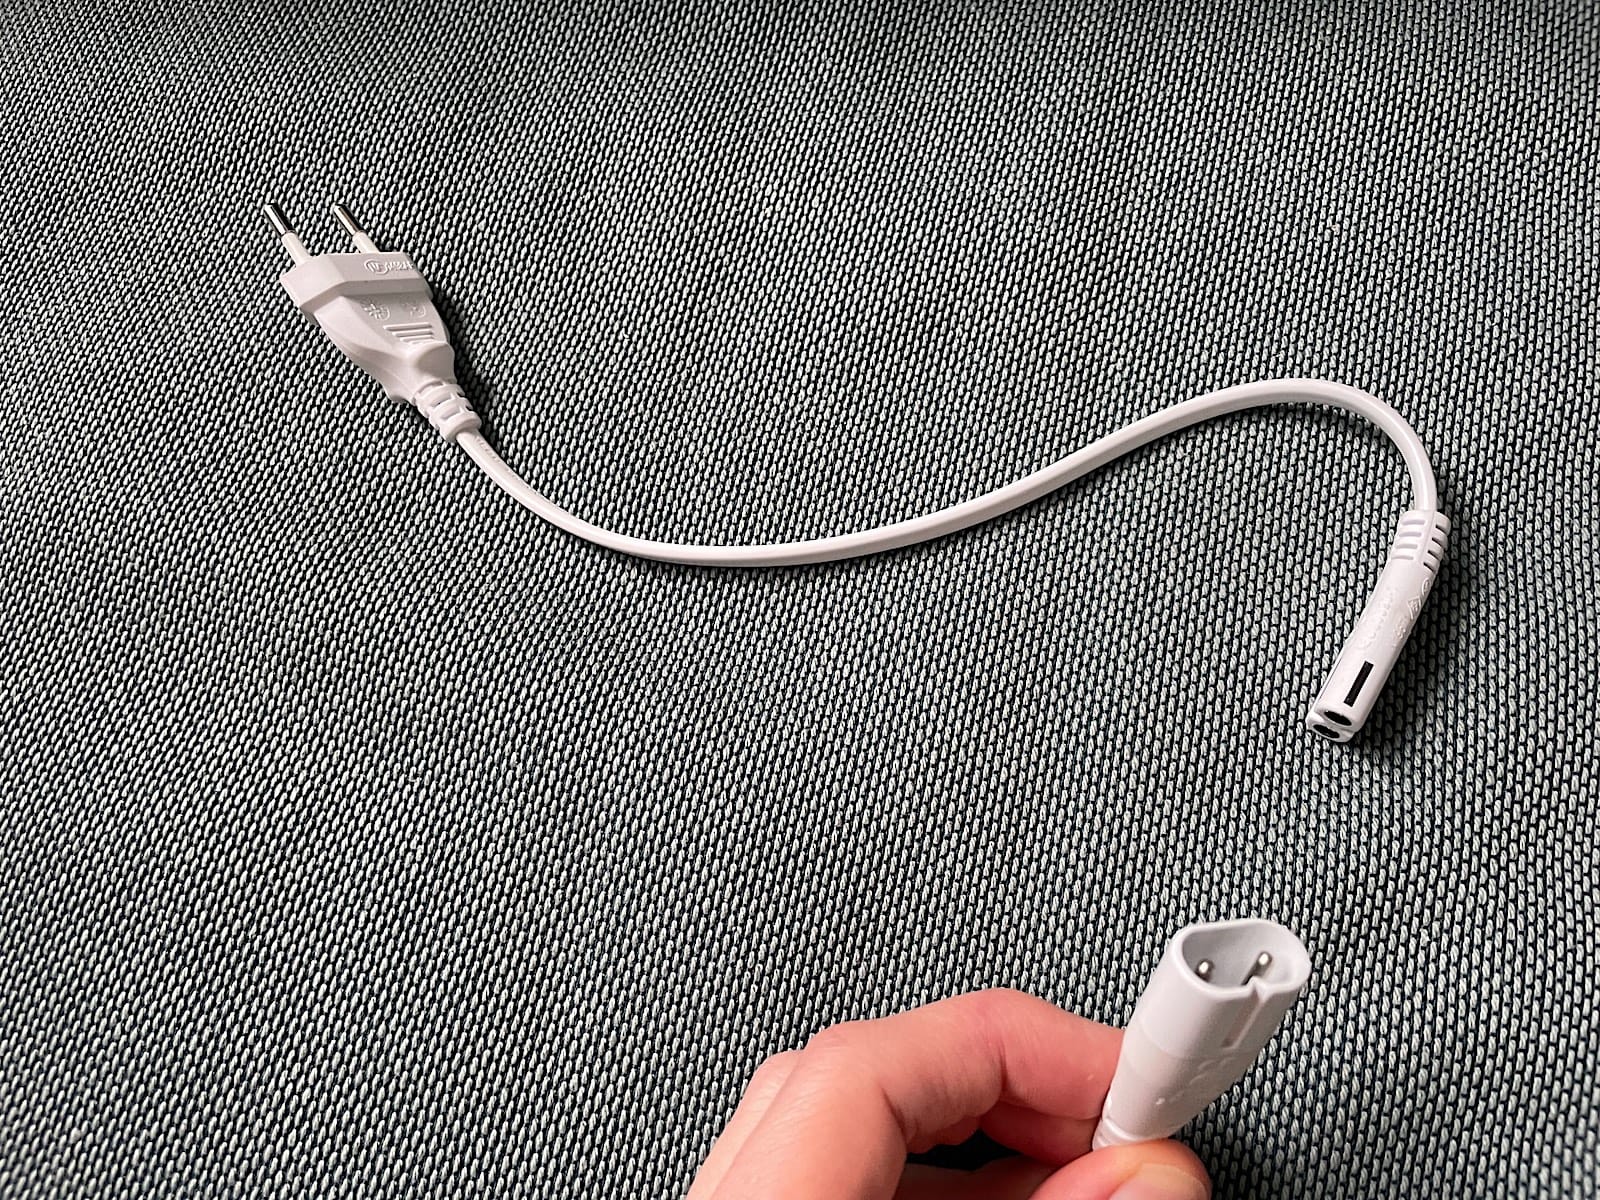
- I have a C7 2m extension cord that can be plugged to the charger’s C8 plug on one side, and that exposes another C8 female plug on the other side (C7 is the male plug). This is mine.
- I then have short 30cm country-specific cables, that can be plugged to the long 2m C7 extension cord, much like LEGOs. Namely, C7-to-US, C7-to-EU and C7-to-UK. Here’s mine for the EU and for the US.
This setup has solved 2 major problems for me:
- I always have a way to reach an outlet that’s too far away for my desk. Adding up the 2m cord, plus the 30cm of the C7-to-country cord, plus the 2m of my USB-C to USB-C cable, the maximum distance from my desk to the outlet is about 4m.
- The per-country cords, measuring only 30cm, do not take up too much space in my suitcase. When I arrive in a country, I swap the per-country short cord that’s in my Day Bag for the one I need from my suitcase, and voilà. The 2m C8-C7 extension cord always stays in my Day Bag since it’s universal.
2️⃣ Hack 2: Work in silence anywhere with the Loop Switch
You don’t control who’s around you in coworking spaces. Sometimes, people have calls right in the silent area, and you cannot all the time politely ask them to go to a dedicated call room. Those situations make it especially hard to focus if you’re, like me, an introvert that’s easily distracted by the outside environment. The only way to cope with that is to isolate (insulate) yourself from external noises.
I’ve tried using multiple kind of in-ear earbuds, lately with the AirPods Pro 2, with some success. However, it requires using them with Active Noise Cancellation all the time, which drains the AirPods battery and can also become uncomfortable after prolonged use (my ears end up feeling weird, and I sometimes I even get a slight headache). Also, it’s not perfect at suppressing noise: I suspect that the AirPod’s ANC algorithms purposefully let some sounds through for safety reasons, eg. children screams and sirens/alarms go through unfiltered.
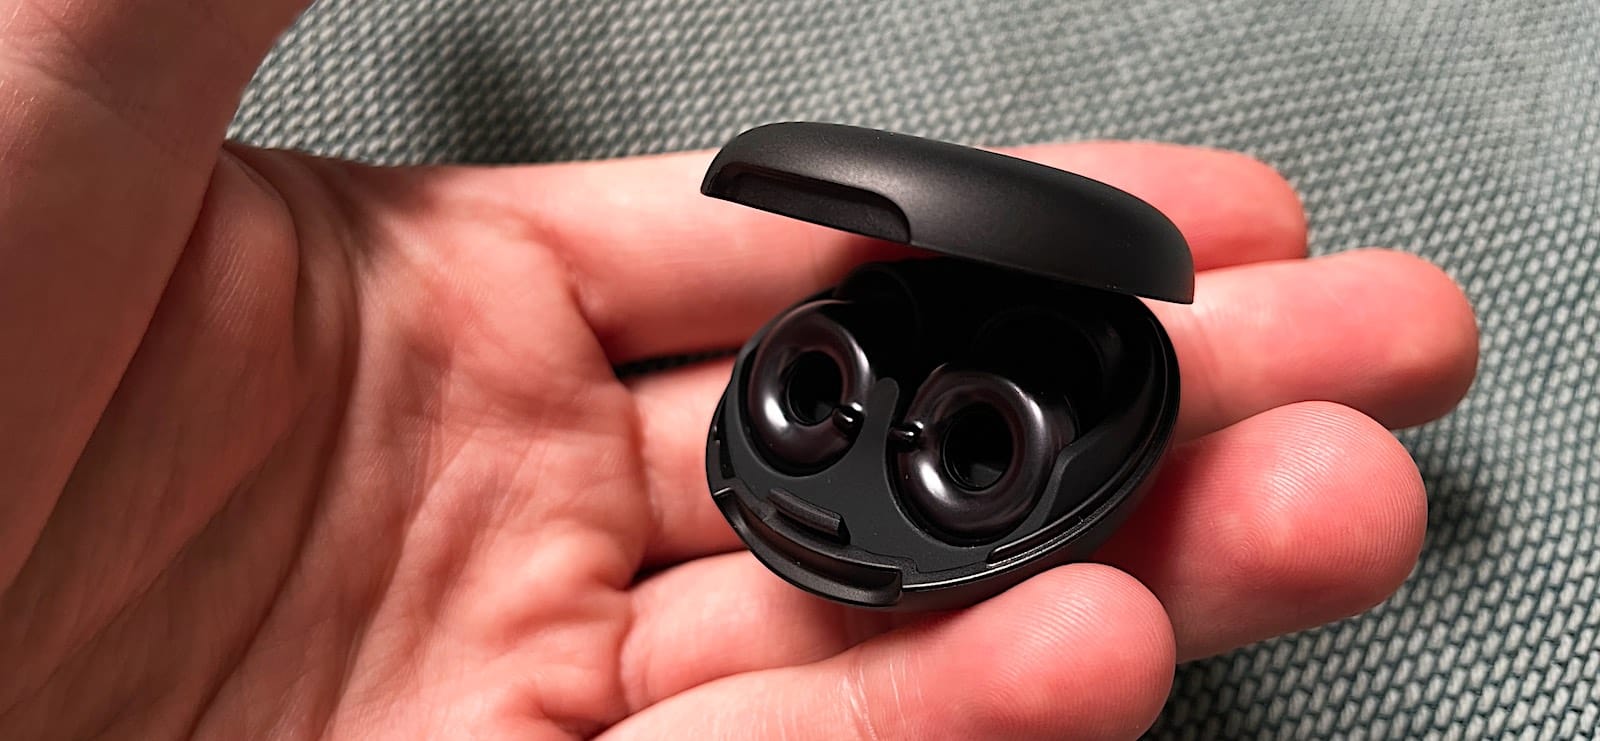
I recently found out about Loop, a brand that manufactures the Loop Switch 2. It’s basically reusable Quies earplugs, made of silicone. You can adjust the sound reduction to 3 levels (3 “clicks”), from being able to hear people talking to you, to cutting every sound off. It’s completely passive (there’s no battery), and in some situations it’s better at suppressing noise than the AirPods’s ANC.
3️⃣ Hack 3: Compact Mac system backups with the 1TB SD card
Backing up your laptop is key. Whether you’re sedentary or nomad. Like all other macOS users, I use a built-in software named Time Machine to back it up on an external disk.
Traditionally, I used an external SSD which was plugged over USB-C. However, the SSD weights quite a bit, and takes some space. Can we do smaller? Yes!
It’s 2025, and nowadays you can buy high-quality 1TB SD cards for cheap on Amazon. And… the Apple Silicon MacBook Pro has a SD card reader!
Although not advised, it’s perfectly possible to use SD cards to store Time Machine backups. SD cards are known to be much less reliable, and prone to random failures, than SSDs. Knowing that, I always back up my Mac in at least 2 different physical locations, using 2 different storage mediums. At home, I have a NAS with a reliable SSD. On the go, I have a tiny SD card that takes no space and can be easily replaced if it fails.
4️⃣ Hack 4: Efficient gear charging with the MagSafe Duo Qi charger
I own both an iPhone and an Apple Watch. Charging two devices at the same time every morning became too tedious for me, since you need to juggle 2 different charging cables and use a 2 ports charger.
The MagSafe Duo, from Apple, solved this pain that I had. It’s portable and charges all my devices fast (including my AirPods). I use this to setup a sedentary charging station, whenever I arrive in an Airbnb or hotel, it’s the first thing that comes out of my Day Bag and sits next to the bed. It’s paired with tiny a Anker 30W GaN charger (EU plug), for maximum charging speed. In case you wonder, I have a good old international adapter in my suitcase that I pair with the Anker wall charger to make it compatible to any outlet when I’m abroad.
Although the MagSafe Duo is not sold anymore by Apple, you can still find it used on second hand electronics websites. Alternative also exist, such as the Anker MagGo Wireless Charging Station.
Gear List (Main Compartment)
In compartment:
- ⚡️ HyperJuice 70W USB-C GaN Travel Charger
- Purpose: charge my laptop when in use.
- Benefit: the perfect balance between charger size and power, all travel adapters are included, including the C8 universal adapter.
- Product: Go to product

- ⚡️ Apple USB-C to USB-C charging cable
- Purpose: charge my laptop on my travel charger.
- 🔌 C7-C8 2m extension cable for charger (and its local adapter, eg. EU prongs)
- Purpose: plug my travel charger on a wall outlet.
- Benefit: long enough to reach the nearest outlet in most situations, can be combined with small US, EU or UK cords.
- 🖱️ Apple Magic Mouse (in black pouch)
- 🎧 Apple AirPods Pro 2 (in black leather case)
- Purpose: noise cancellation, making calls and quickly listening to audio messages.
- Benefit: can be quickly taken in and out of the bag when needed.
- 🎧 Sennheiser CX series wired earbuds black
- Purpose: listen to music to focus during long code sessions.
- Benefit: no need to charge a battery, it’s wired.
- 🎧 Loop Switch 2 black
- Purpose: cut myself from any ambiant noise for maximum focus.
- Benefit: completely passive, no battery, better than AirPods Pro 2 at noise cancellation.
- Product: Go to product
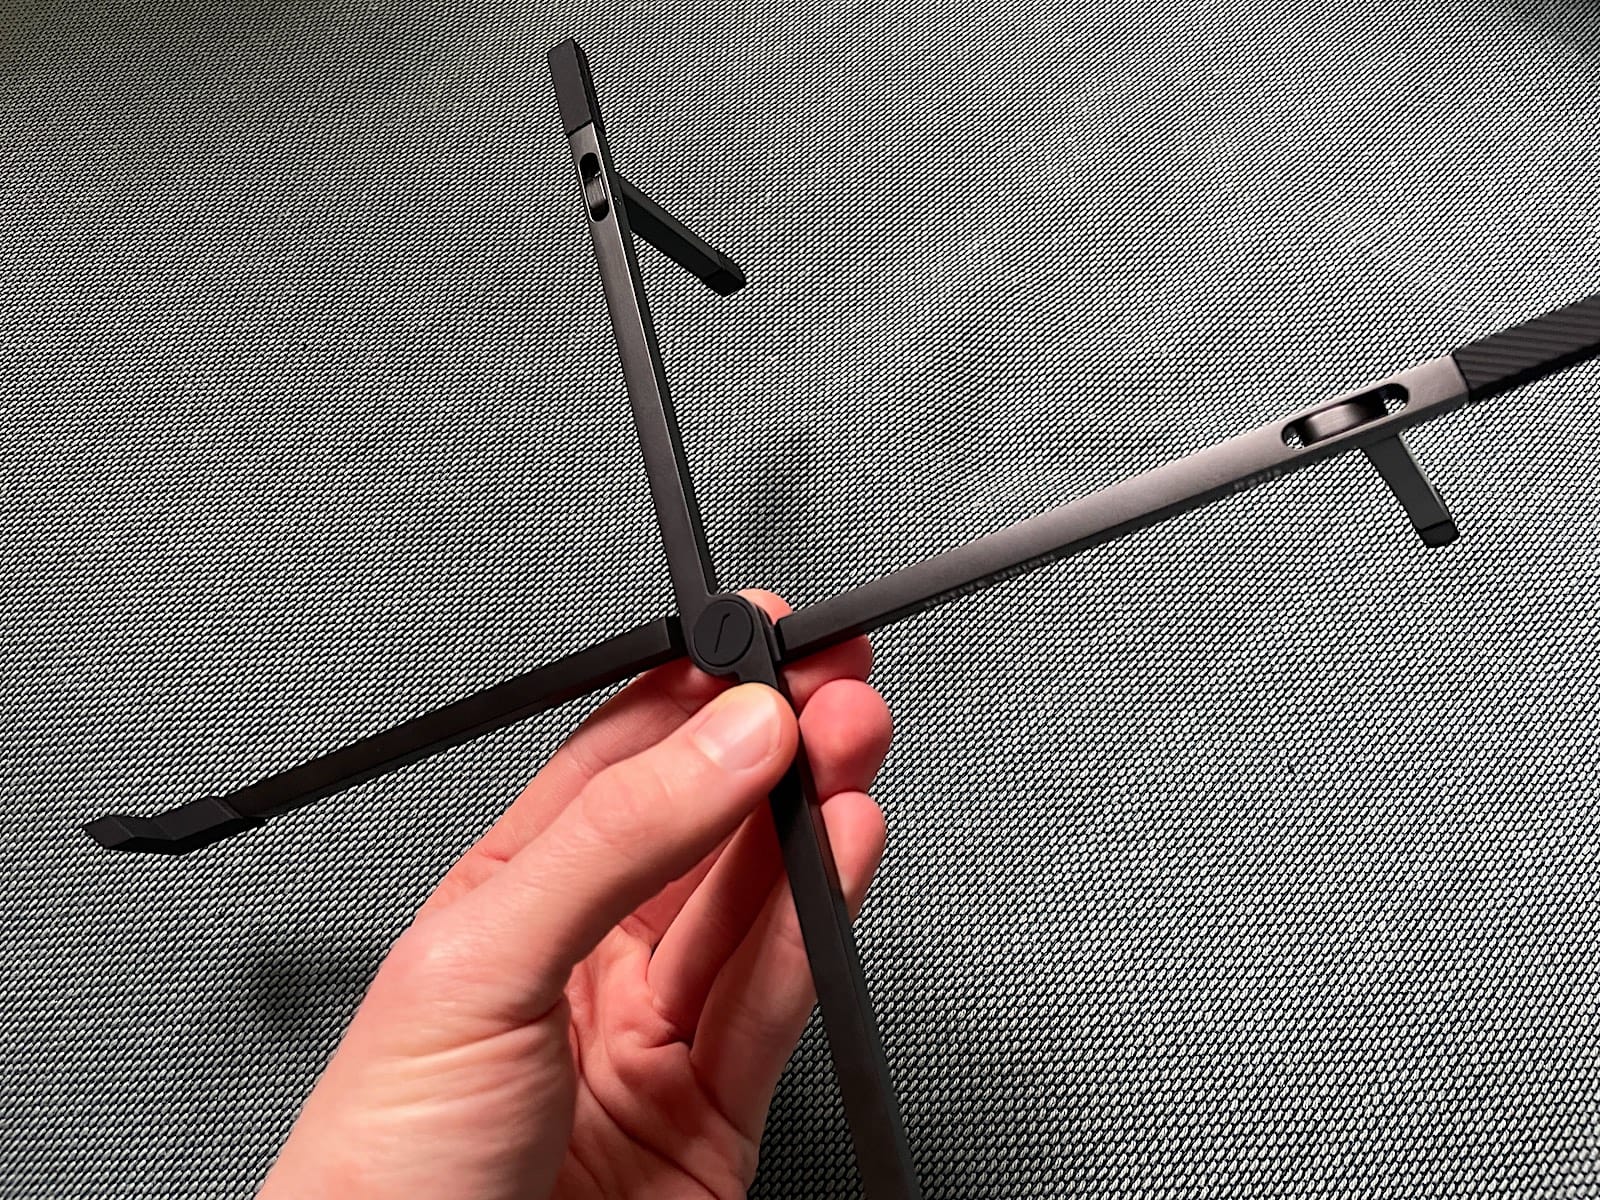
- 🪑 Native Union Fold Laptop Stand
- Purpose: hold my laptop at an optimum angle, raising the display and making my neck posture healthier (helping me avoid the infamous 🦐 “shrimp position”).
- Benefit: the most lightweight laptop stand of its category, at only 72g.
- Product: Go to product
- 🖊️ Black ink pen
- 🪪 Passport wallet, with backup credit cards, cash and driving license copy (in RFID-blocking pocket)
- (Nomatic/Gomatic Tech Organizer bag is stored here as well)
In tech organizer:
- 💳 Apple MagSafe Wallet black
- Purpose: becomes my “backup cash” wallet when I don’t wear a coat and I need to get outside.
- 🎧 Apple lightning to jack adapter
- Purpose: fallback way to plug any jack headphones to my iPhone.
- 🔒 Yubikey 5C NFC
- Purpose: the key I use to get MFA codes to log in to sensitive accounts.
- ⚡️ Apple MagSafe Duo
- Purpose: charge my phone and watch at the same time.
- ⚡️ Anker 511 Nano 4 30W USB-C charger EU white
- Purpose: used with the MagSafe Duo
- Product: Go to product
- ⚡️ Apple USB-C to lightning cable white (2x)
- Purpose: one is used for the MagSafe Duo, the other is always kept in my bag.
- ⚡️ USB-C to USB-C cable short black
- ⚡️ USB-C to micro-USB cable short black
- ⚡️ USB-to-USB-C adapter
- Purpose: convert old USB to USB-C.
- ⚡️ USB-C-to-USB adapter
- Purpose: convert USB-C to old USB.
- 💾 Sandisk Extreme Pro 1TB SD card
- Purpose: store my MacBook Time Machine backups.
- Benefit: much smaller and lighter than an external SSD.
- 💾 Micro-SD to SD adapter
- Purpose: I don’t own any microSD card, but can come handy eg. if I use a drone from someone else.
- 💾 Sandisk 16GB USB key
- Purpose: the fallback way to transfer files between computers, with it’s not possible to AirDrop (eg. Mac to PC).
- 🧽 Microfiber glass cloth
- Purpose: clean my MacBook Screen (cleaning, 1st pass).
- 🧽 Apple polishing cloth
- Purpose: clean my MacBook Screen (finishing, 2nd pass).
- Benefit: overkill, but stylish.
2. The Back Compartment (Laptop Area)
The compartment that stores my laptop is well-padded and pretty simple: it’s a pouch in which you slide your laptop in. Nothing fancy here.
Since the compartment also has a slim side pouch to store tablet, I use it to store the mouse pad that I use with my Magic Mouse, and some paper (used for wire-framing or brainstorming).
Gear List (Back Compartment)
- 💻 MacBook Pro 16’ M1 Pro 16GB 1TB Silver
- 🖱️ Logitech mouse pad Studio Series Black
- Purpose: not always needed, but some tables/desks are not 100% flat, making using a mouse very uncomfortable.
- 🖊️ A4 paper (x5-10)
- Purpose: draw quick wire-frames or brainstorm on new ideas.
3. The Front Quick-Access Pocket
My Nomatic bag has a convenient quick-access front pocket. It’s rather slim so storage capacity is very limited. I use it to store my e-reader (a Kindle Oasis, that’s also very slim).
Inside of this front pocket, lies a secret pocket (a zipper pocket inside the zipper pocket!), which I use to hide an AirTag. The AirTag is inserted into a credit-card sized casing, so that it is flatter and thus will not create a visible bulge in the pocket… making it look less like a hidden AirTag to thieves.
Gear List (Front Quick-Access Pocket)
- 🛜 AirTag, in Spigen Air Fit casing, in front pocket hidden inner pocket
- Purpose: locating my Day Bag if lost or stolen.
- 📖 Kindle Oasis, in front pocket
- Purpose: read books and PDFs, typically before sleep.
- Benefit: insane battery life, emits no light and looks like paper, therefore perfect before sleep.
4. The Side Quick-Access Pocket
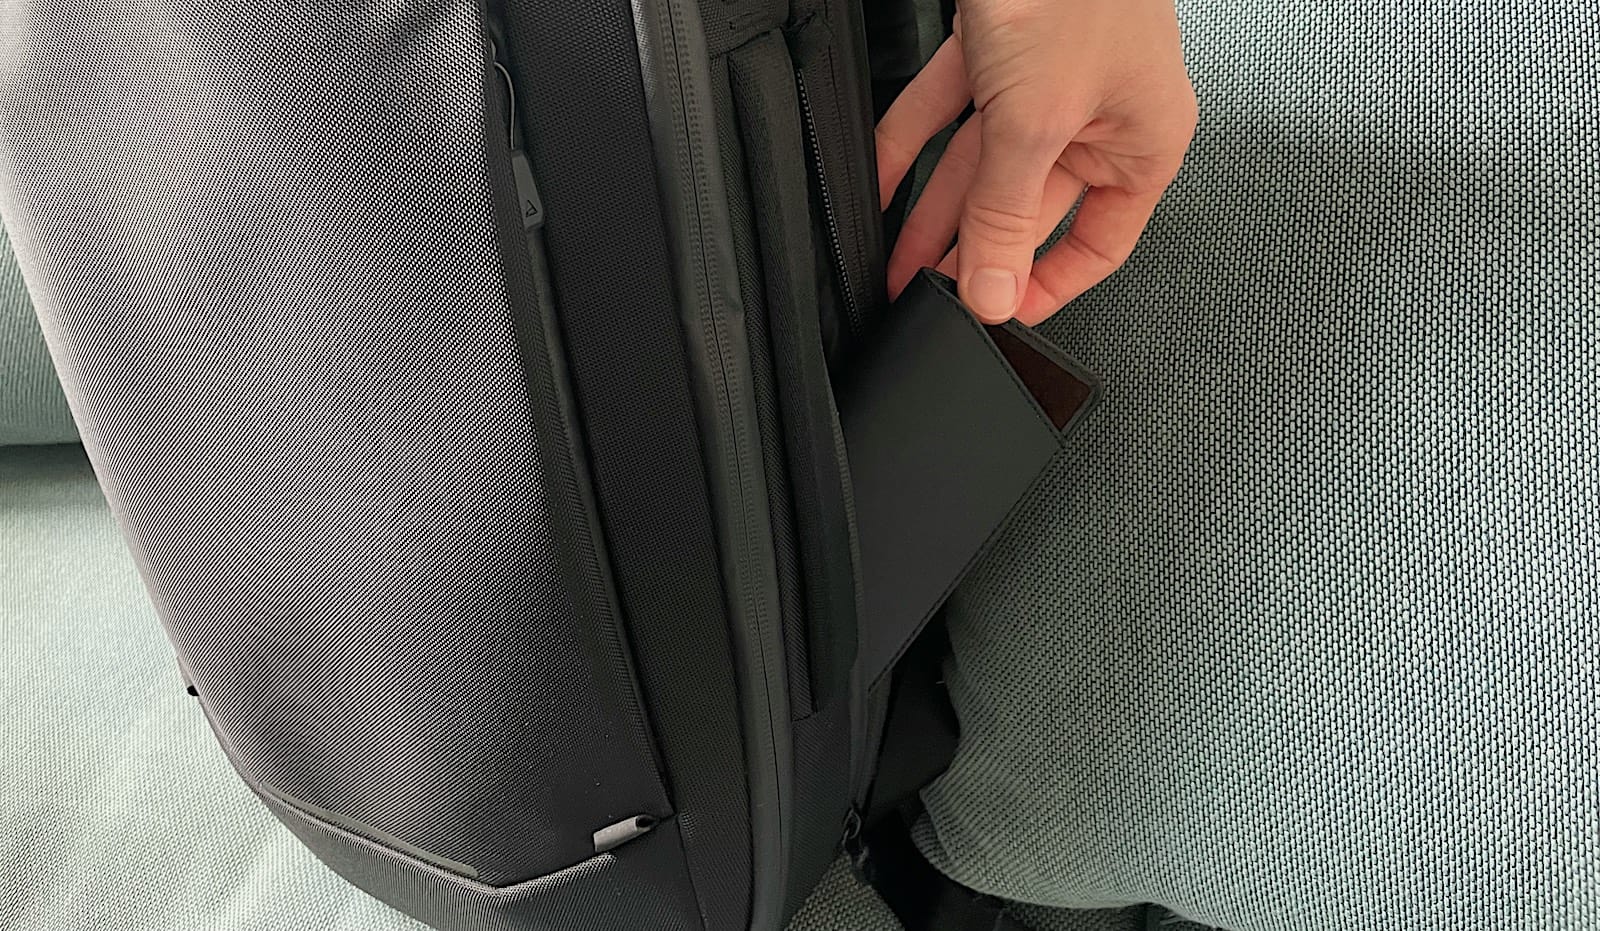
On the lateral side of the backpack, there’s another quick-access pocket which was designed to store a small water bottle. However, I find it unpractical for water bottle storage; instead, I use it to store my prescription glasses.
🛠️ Special Hacks
Those are tips that you can get inspired from to optimize certain aspects of your own setup. Those hacks are the result of years of iterative improvements.
1️⃣ Hack 1: Minimizing the footprint of the my prescription glasses
The side pocket of the Nomatic backpack is not very practical, since storing or taking an object with a thick shape like a hard box for my glasses requires opening all large compartment of the bag to create enough room for the pocket zipper to be expanded, and the box to be taken out.
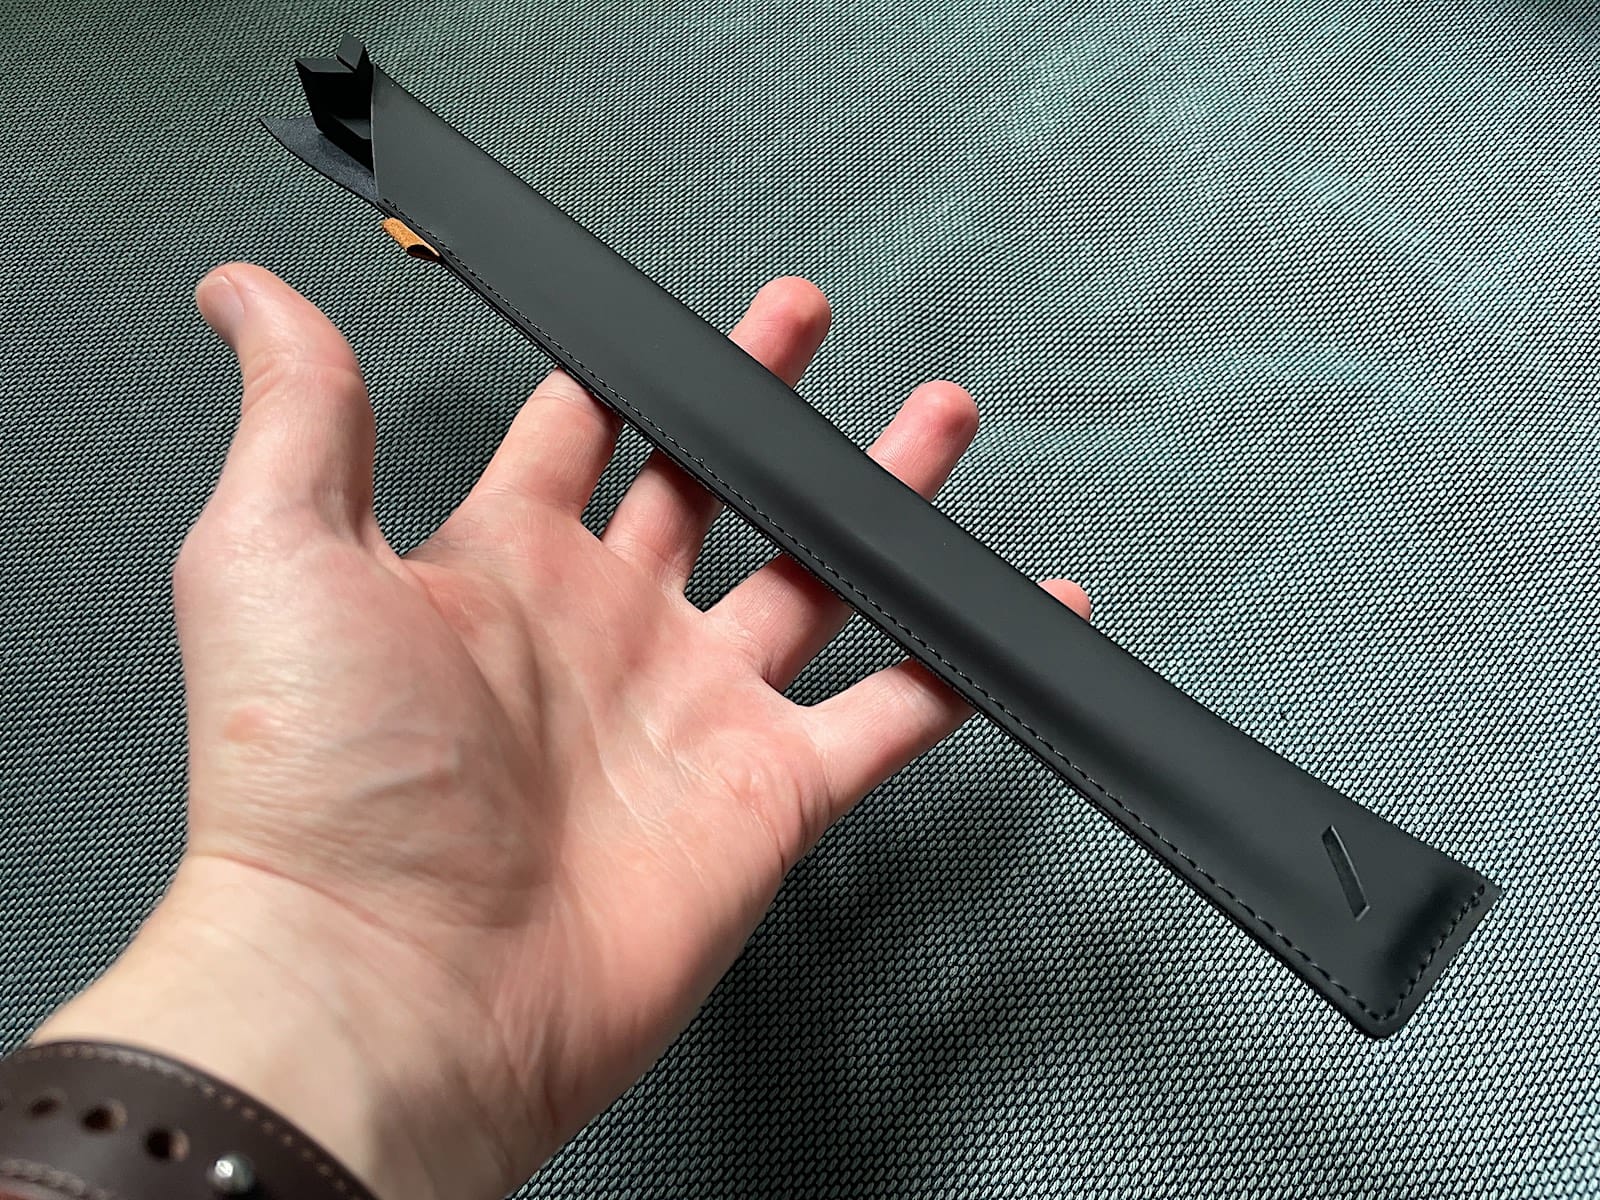
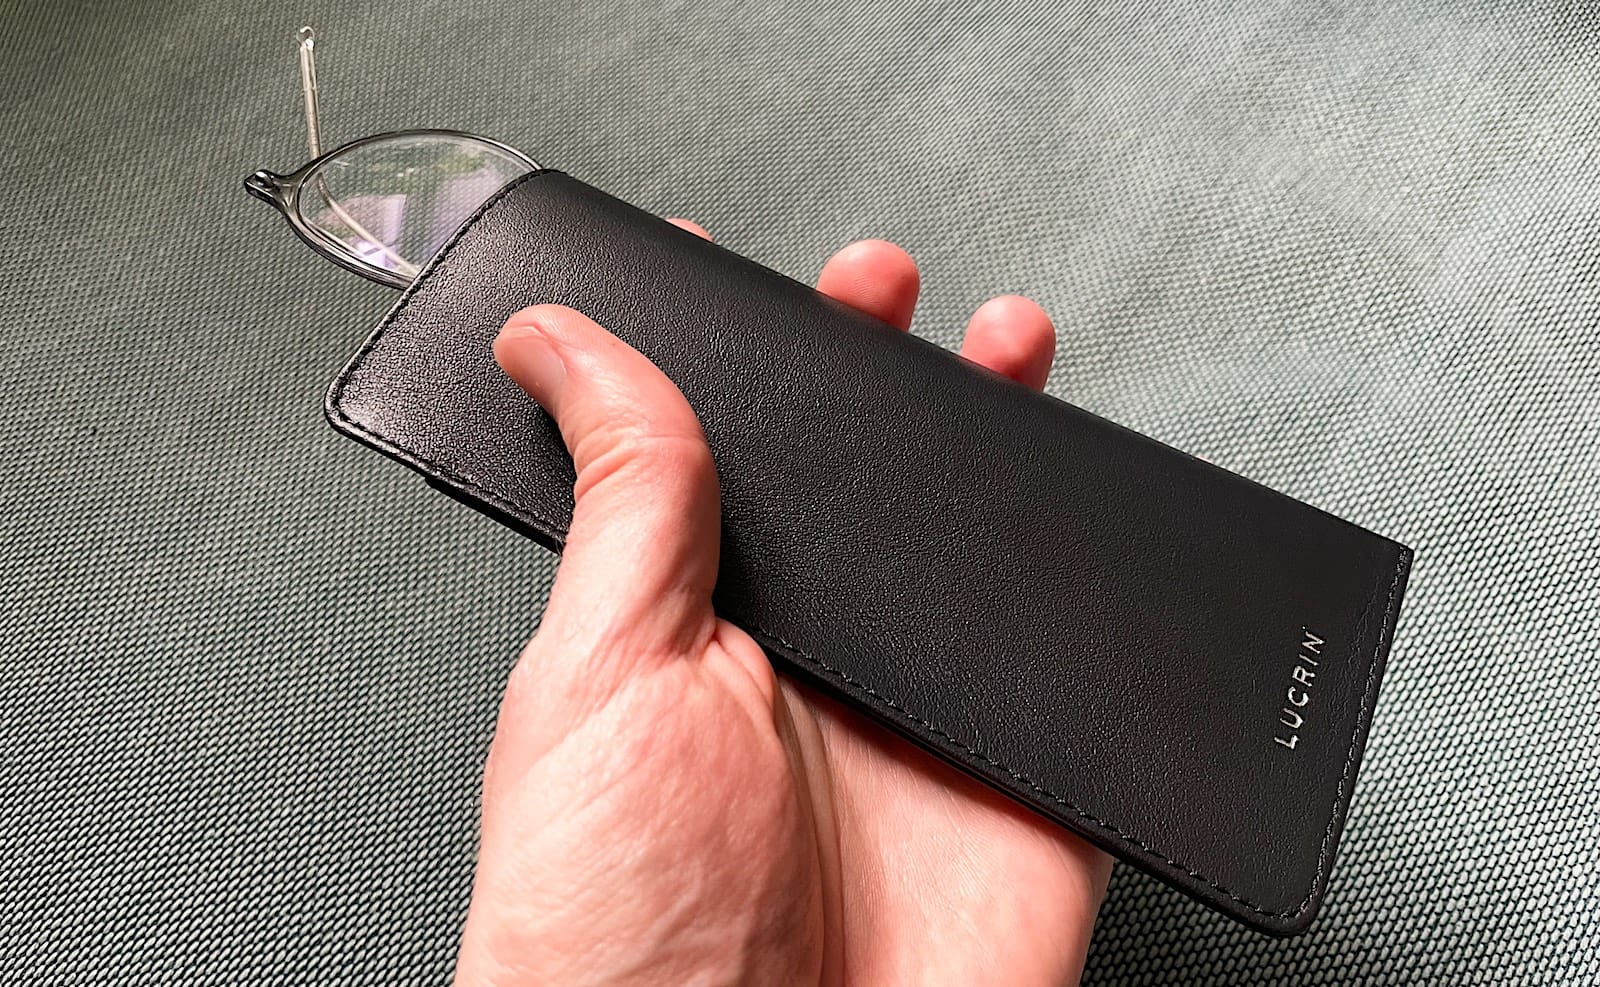
To address that practical problem, I’m storing my glasses in a slim leather pouch, so that I can quickly get my glasses in and out without the fuss of opening all other compartments to stretch the zipper.
Gear List (Side Quick-Access Pocket)
- 👓 Prescription glasses, in Lucrin leather pouch, in lateral pocket
- Benefit: the leather pouch takes much less space than a hard box, making it easier to slide the glasses in and out of the backpack.
- Product: Go to leather pouch product
🎁 Bonus: My Extra Tech Bag
For some extra comfort, I also own a portable monitor, as well as a 5G mobile router. After experiencing traveling to countryside houses by car, usually during the summer in the EU, new problems emerged. Especially, the lack of Internet in certain remote countryside homes, poor network speed, or bad WiFi coverage through the house.
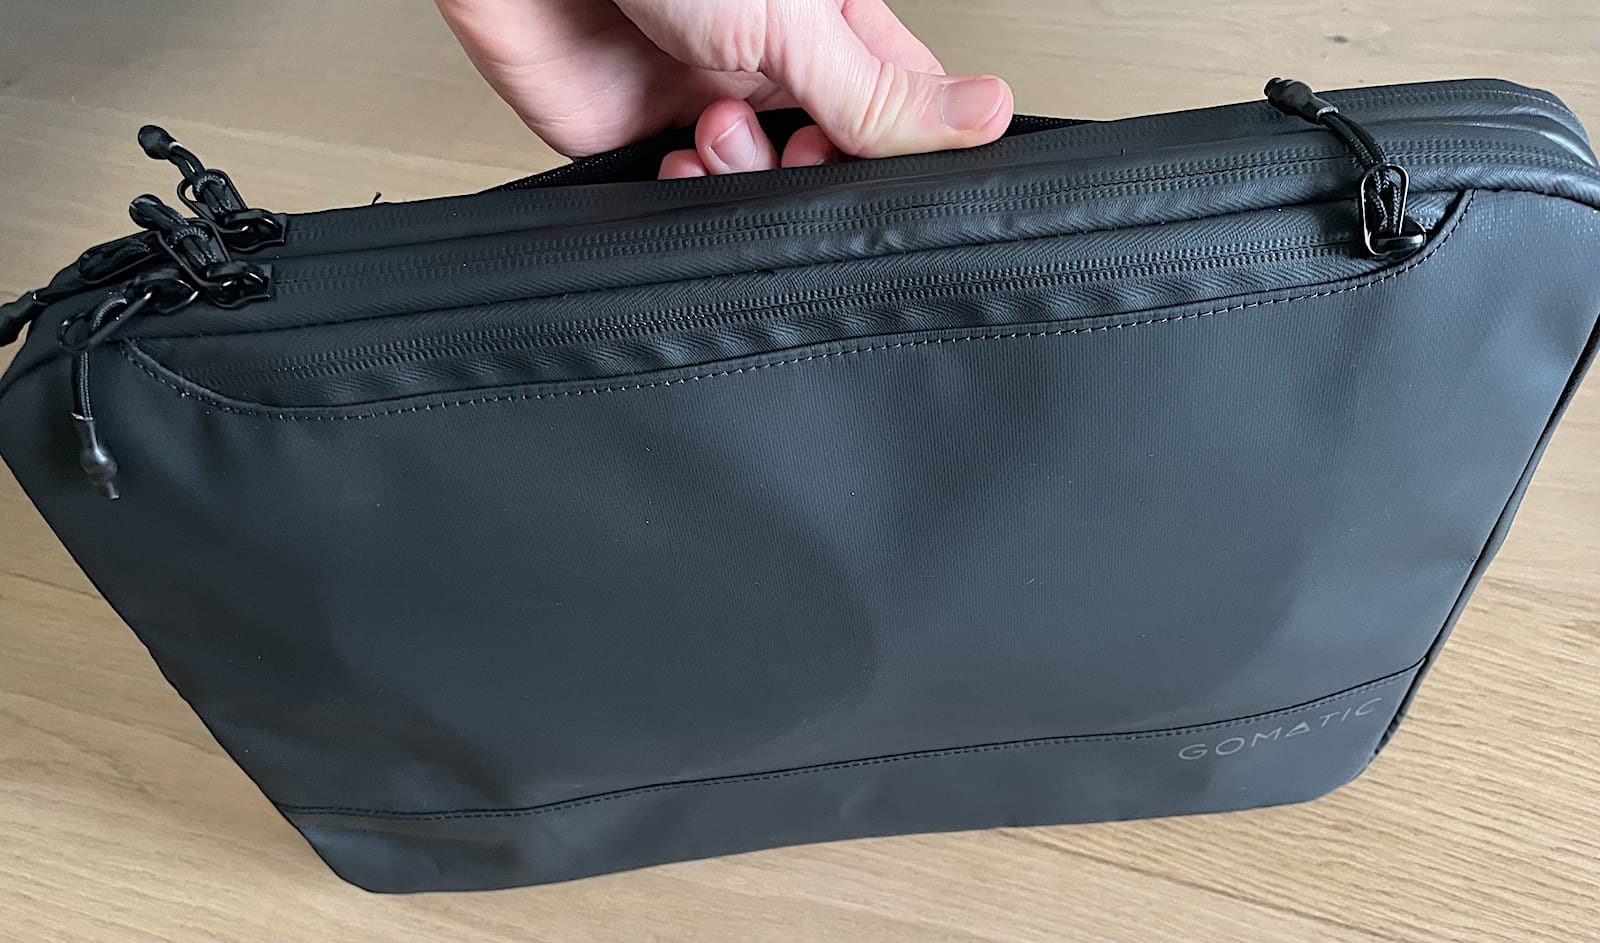
Those extra accessories are held in another bag, from Nomatic: the Tech Case. When I travel, I can choose whether to take this bag with me, or leave it at home.
The portable monitor comes from SOTSU, a brand known to make high-quality portable monitors, with a foldable stand. Their monitors pack like a laptop, and expand to look like a mini Apple Studio Display. My SOTSU monitor is 16 inches (the same size as my MacBook Pro screen), and supports the DCI-P3 color space. I place it above of my MacBook Pro and typically use it when I do Web integration work (the code editor on the laptop screen, and the Web browser on the monitor above).
The 5G router is made by NETGEAR. It supports 3G/4G/5G. It always beats my iPhone at signal quality (eg. when my iPhone shows 1 signal bar, the NETGEAR would show 3 bars). I have a French SIM card with EU roaming inside of it, providing me with 200GB of data per month, everywhere. I ran a speed test in the city I live and hit speeds north of 700Mbps. I don’t intend to use this router much, compared to my other tech gear. However, it is my lifeline in case I arrive in an Airbnb or hotel with terrible Internet. An external antenna (sold separately) can also be plugged to the router for extra signal.
You may ask yourself: why do you carry this setup as an extra, aside to your Day Bag and suitcase? Why not putting everything in your Day Bag? The reason is simple: more stuff means more space and more weight.
Also, I don’t intend to use my portable monitor in eg. coworking spaces, since unfolding it and folding it back takes time, setting and unsetting the entire thing takes up to 10 minutes each time. Rather, I think of this setup as a permanent comfy work station that I can deploy in any Airbnb or hotel I stay in long term. I unpack when I arrive, and 1 month later when I leave I can pack it again. Another benefit of this bag, is that it comes with a separate charger and USB-C cables, which allow me to avoid using the stuff from my Day Bag. If I leave the Airbnb for a coworking on a given day, I won’t have to pack the charger and USB-C cable back to the Day Bag, because I use a second charger at home.
This setup is only limited to trips by car within the EU for the moment, since taking it on a plane would mean I’ll then travel with 1 carry-on and 2 accessories, which is over the allowed limit. I intend to find a better carry-on suitcase with a hardshell front pocket that could store that little tech bag, without compromising on the capacity of the suitcase.
Gear List (Tech Bag)
The bag:
- 🎒 Nomatic/Gomatic Tech Case black
- Product: Go to product
In main compartment:
- 🖥️ SOTSU FlipAction Elite 16’
In accessories compartment:
- 📶 Netgear Nighthawk M3 5G Router
- Purpose: create a permanent WiFi network for the whole home, with good 4G/5G coverage.
- Product: Go to product
- ⚡️ Aukey USB-C 60W 2-ports GaN charger EU black
- Purpose: power the portable monitor, which in turn powers the laptop (with power passthrough).
- ⚡️ Anker 511 Nano 4 30W USB-C charger EU black
- Purpose: power the 5G router.
- Benefit: using a dedicated charger for the router allows the 5G router to be placed away from the workspace, so that the best placement for cellular coverage can be found in the home.
- ⚡️ USB-C to USB-C cables (x3)
🇫🇷 Written from Nantes, France.